![View More: http://razialife.pass.us/lily-and-richs-wedding]()
[row][column sm="12"]
![]()
[/column][/row][row][column sm="12"]
![View More: http://razialife.pass.us/lily-and-richs-wedding]()
[/column][/row][row][column sm="6"]
![]()
[/column][column sm="6"]
![View More: http://razialife.pass.us/lily-and-richs-wedding]()
[/column][/row][row][column sm="12"]
![View More: http://razialife.pass.us/lily-and-richs-wedding]()
[/column][/row][row][column sm="12"]
![View More: http://razialife.pass.us/lily-and-richs-wedding]()
[/column][/row]
[row][column sm="12"]
![View More: http://razialife.pass.us/lily-and-richs-wedding]()
[/column][/row]
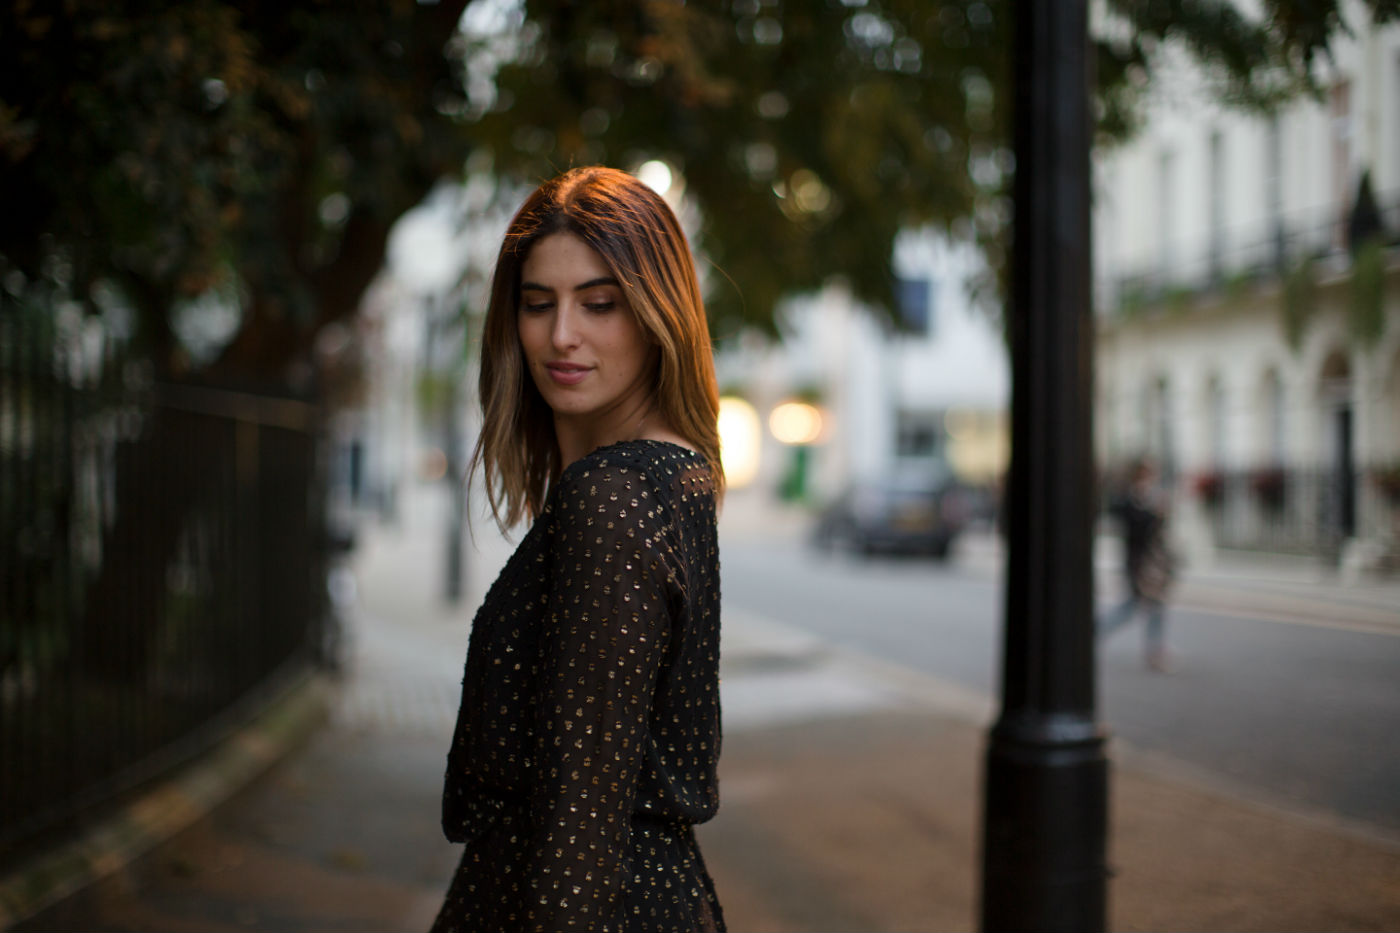
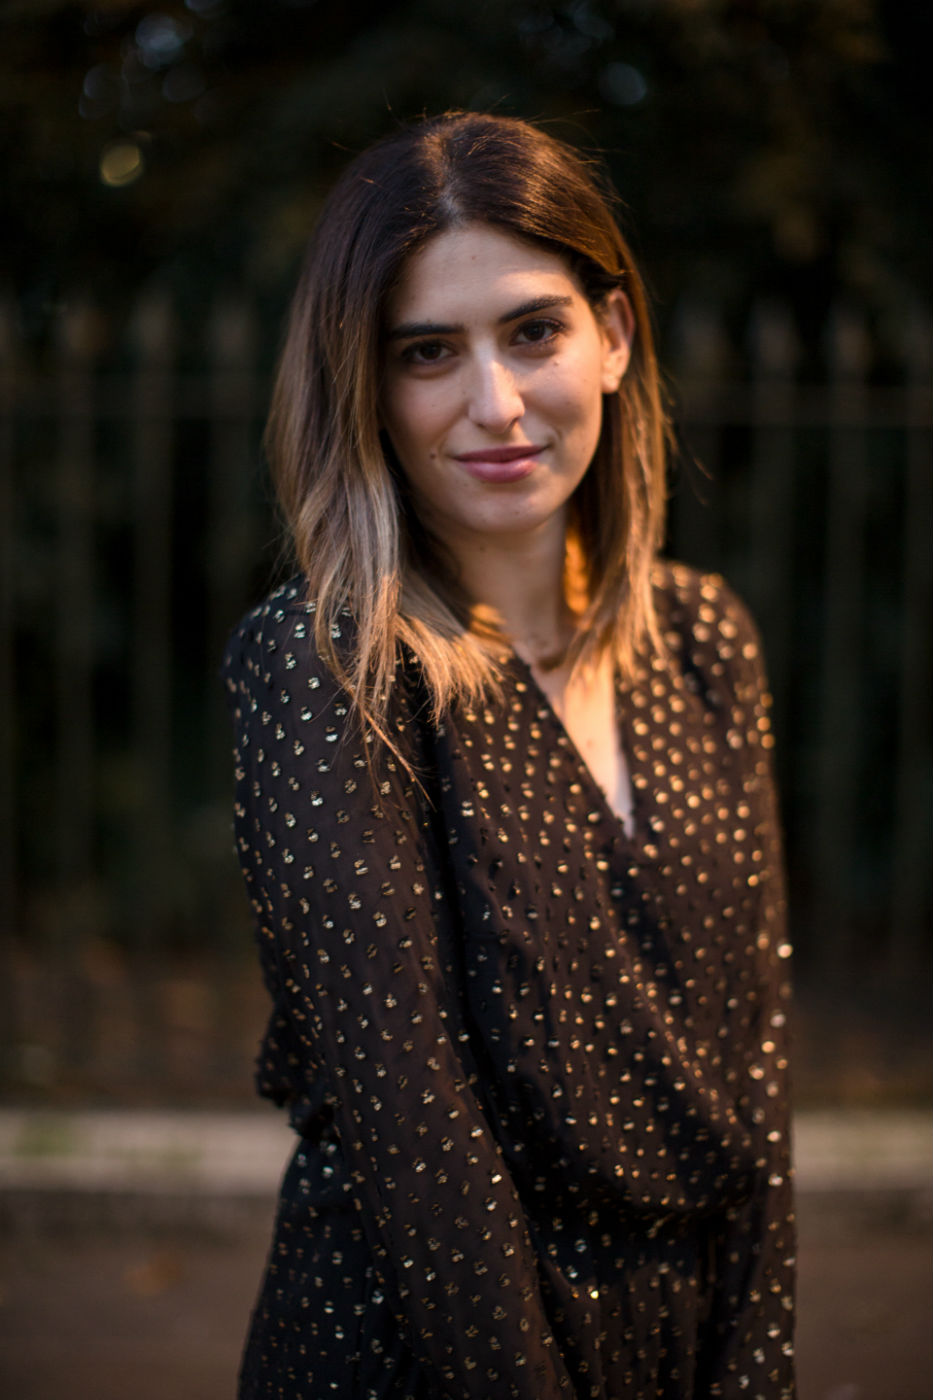
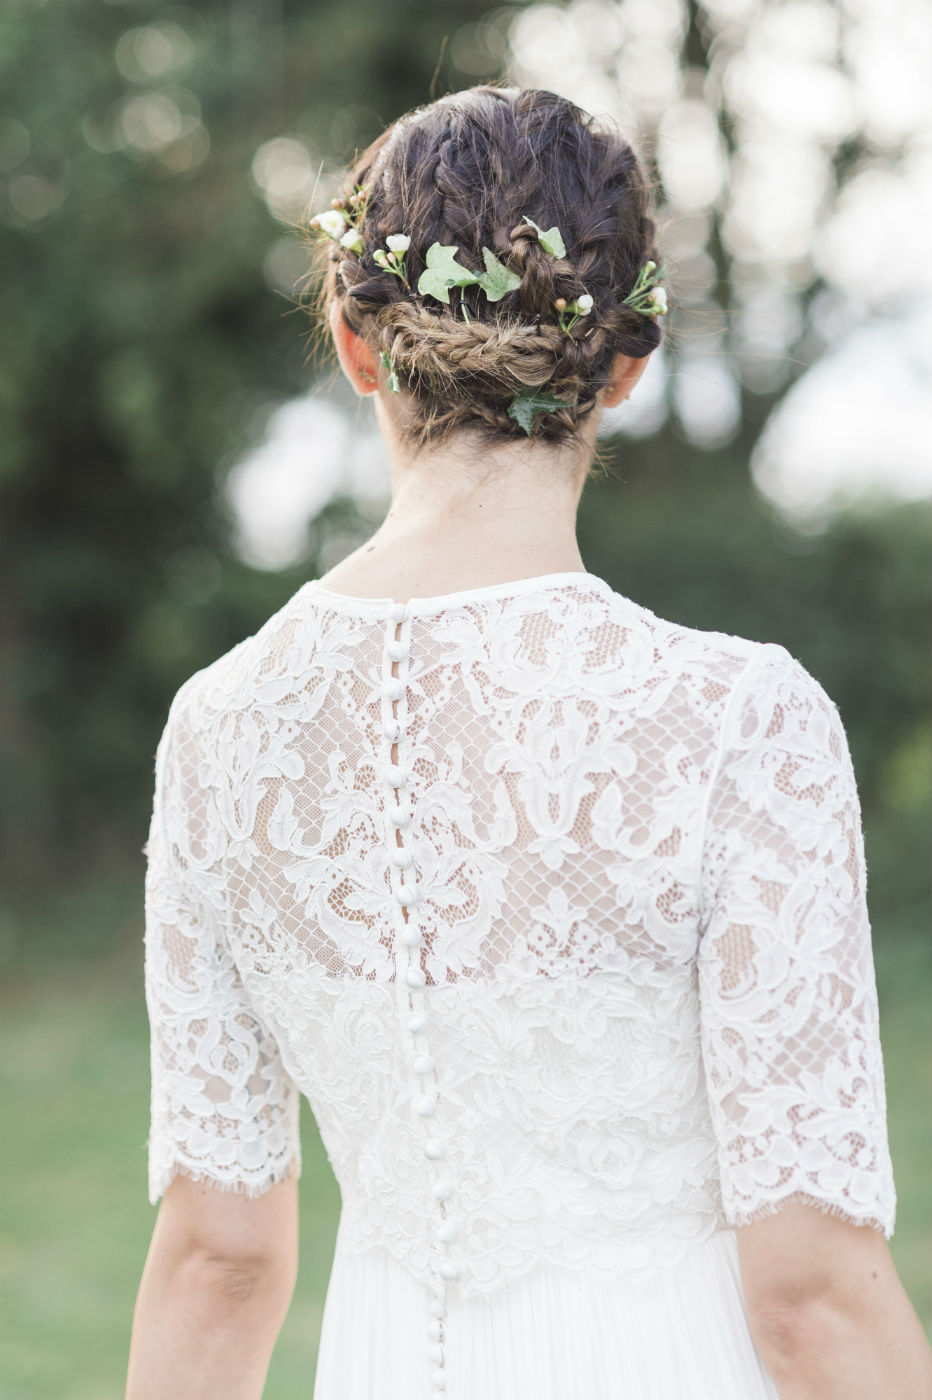
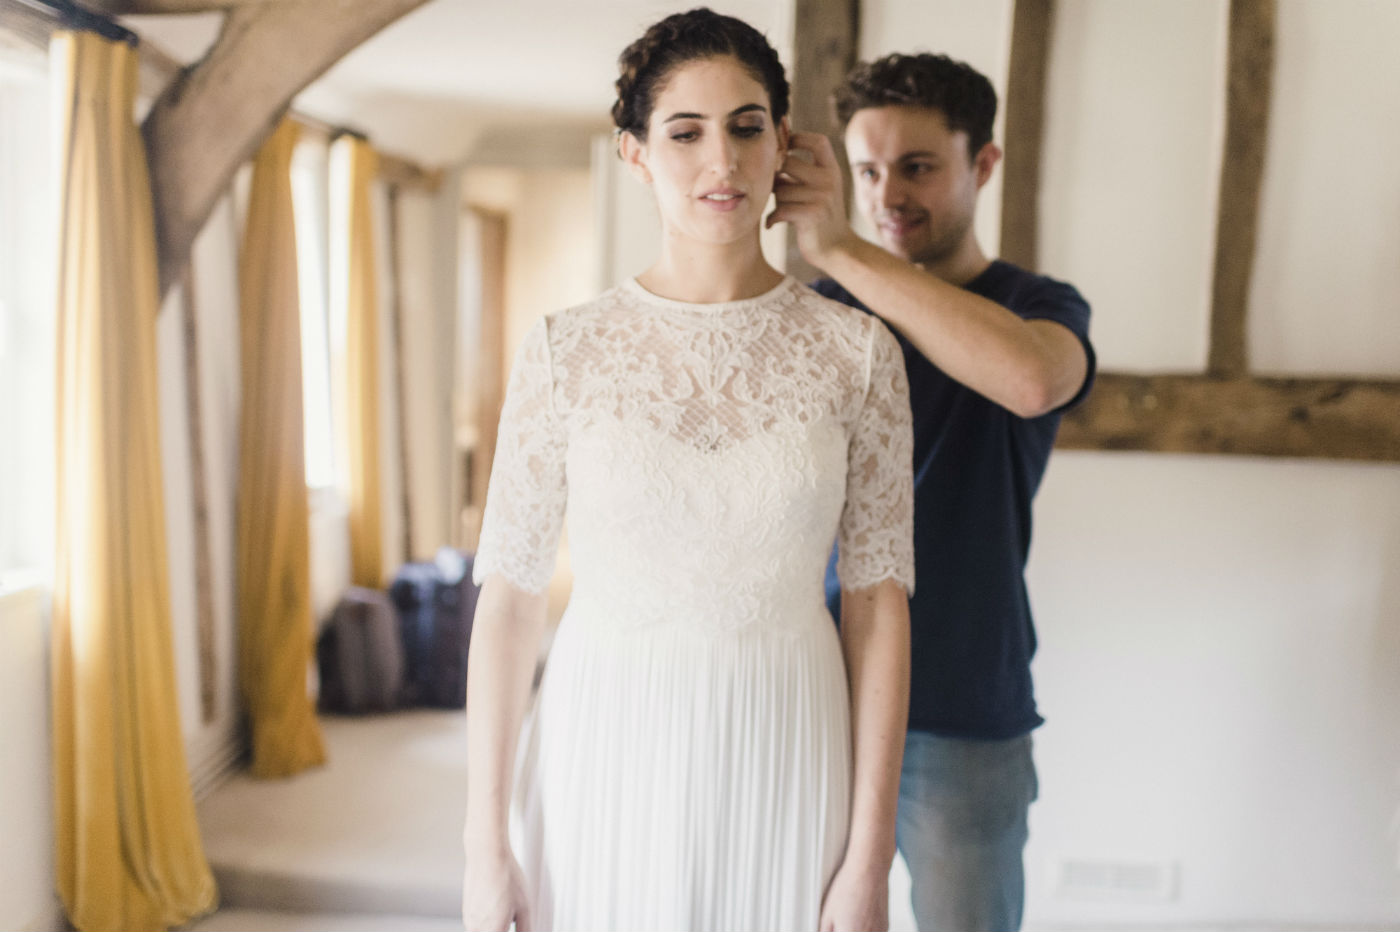
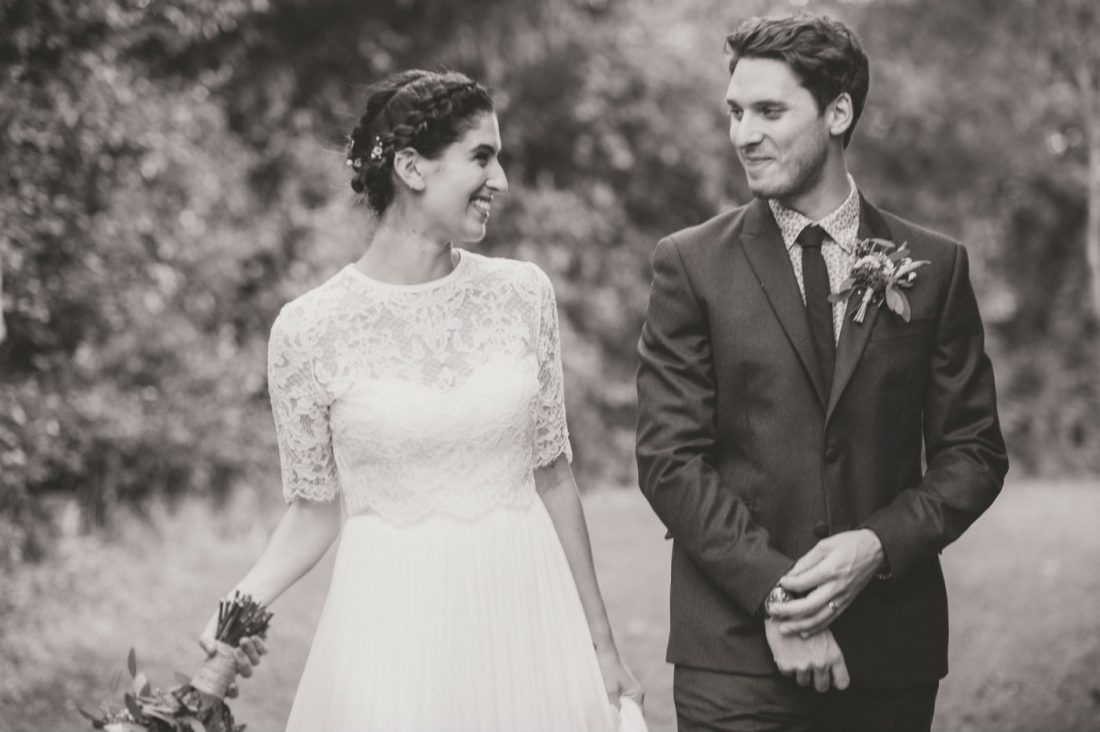
I'd never really thought about wedding dresses before I got engaged. In all honesty I had never really seen a bride and thought "ooh I'd love to wear that". I had always been quite confused about the idea of being uncomfortable on your wedding day, not being able to breathe or eat. When I first got engaged I thought maybe I could just go to Selfridges and buy a really nice dress to wear, why did it need to be a wedding dress from a bridal shop? Turns out my laid back approach wasn't as easy to execute as I thought and I struggled to find something that felt right.
The first time I tried on a wedding dress was at a sample sale and we all laughed our heads off as I tried on dresses that made me look like I was playing dress-up. The sample sale process was really intense, I'm not sure I'd recommend that unless you know
exactly which dress you want and you know it's going to be there. Honestly I was completely shocked by the price of wedding dresses, I had no idea that people spent that much on their dresses. I think it depends where you prioritise your budget, I personally wanted to invest in the things that would benefit everyone, like food, drink, music and decor. I first went to Mirror Mirror, then to Charlie Brear and then luckily, I struck gold on the third place.
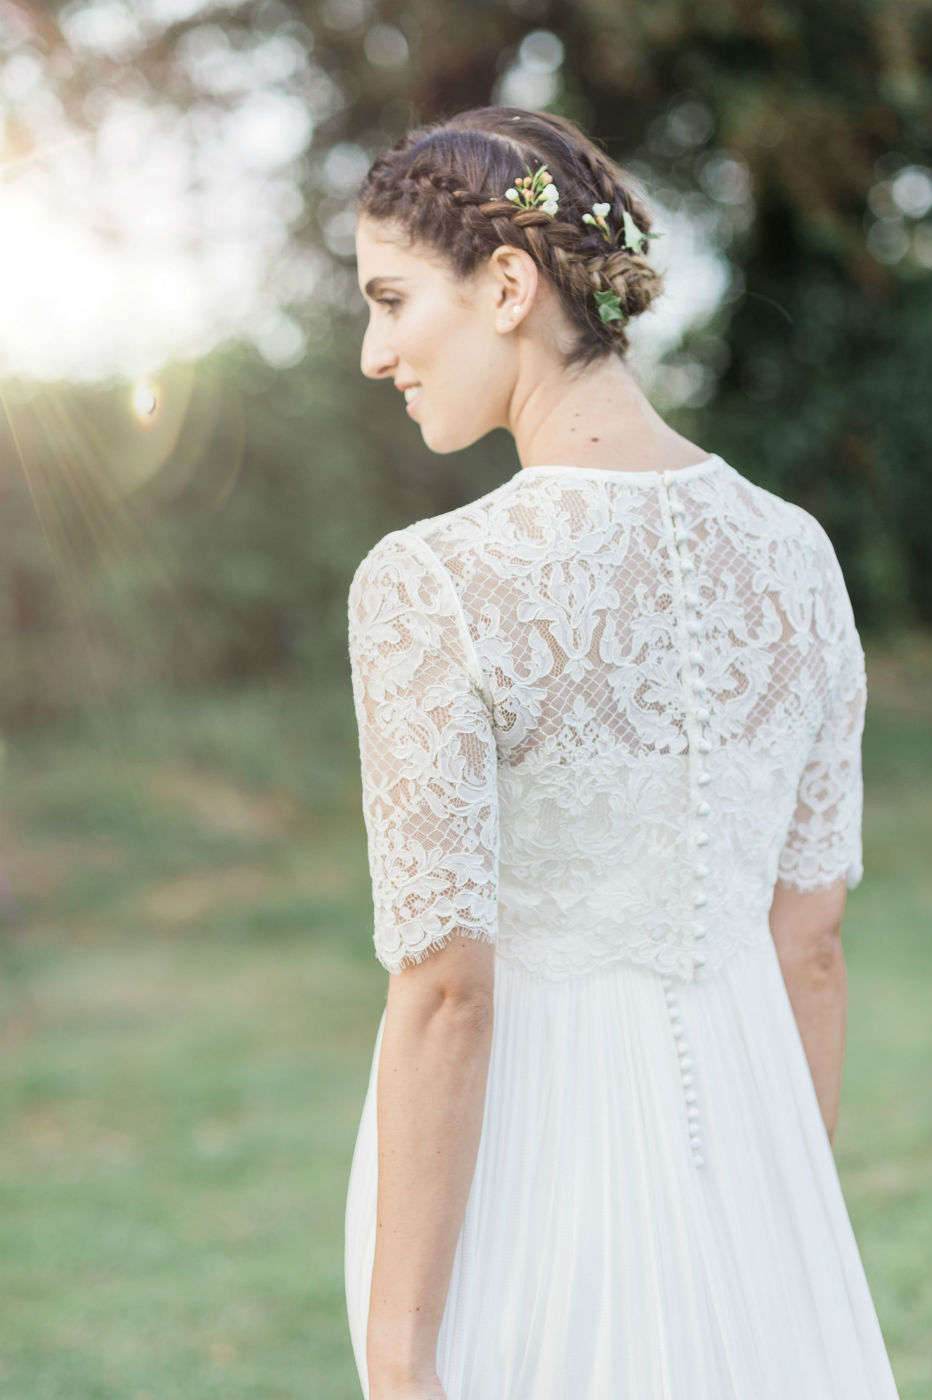
Catherine Deane seemed like a really nice, semi-casual brand, I knew I wanted something comfortable, flattering and that made me look like me.
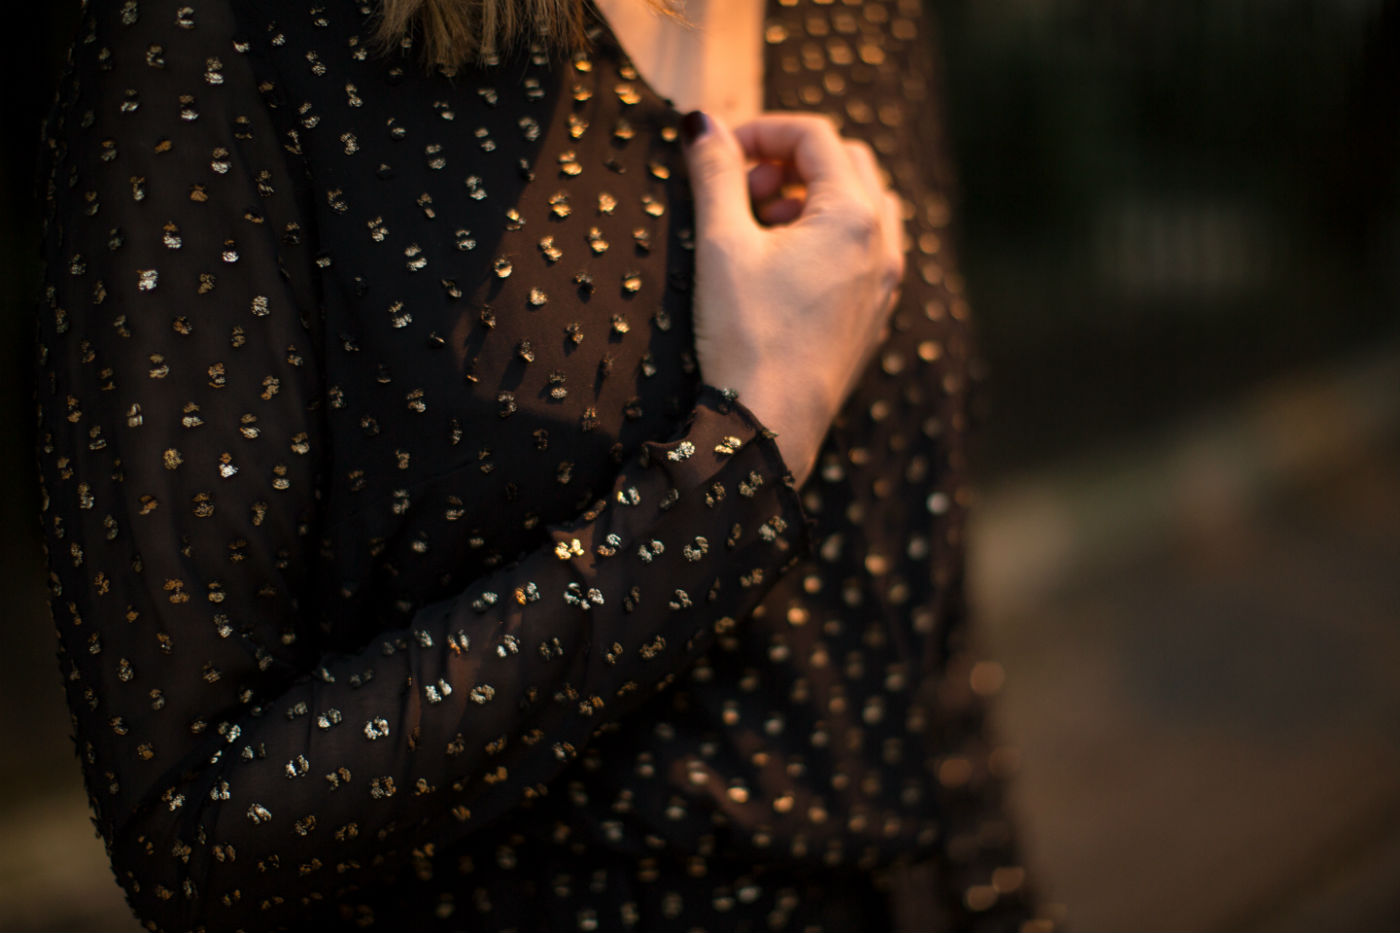
After trying on a few dresses that weren't quite right, I tried on some of their separates. My final pick was a satin bodice with a high waisted silk tulle skirt and a lace button back top. It looked just like a dress but because it was separates it was a bit more affordable than the dresses, score! I still think it's a lot of money to spend on one day but I was happy with the price I spent and what I got for my money. I wore the Catherine Deane
Dasha top and the
Anika skirt with the
Darla bodice.
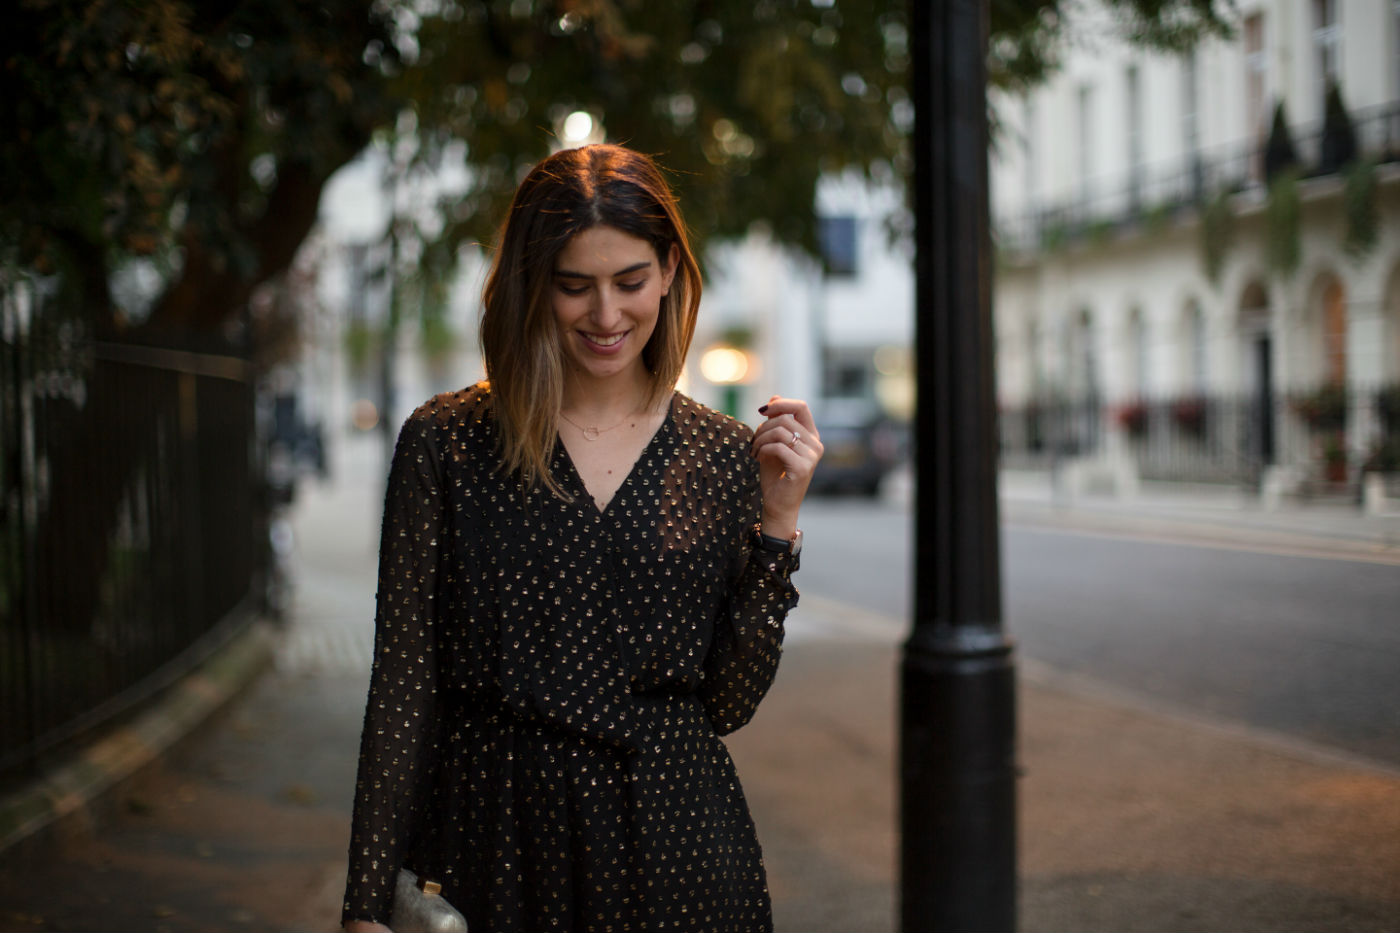
You know you've found the one when you do a little dance in the mirror. That's when you know.
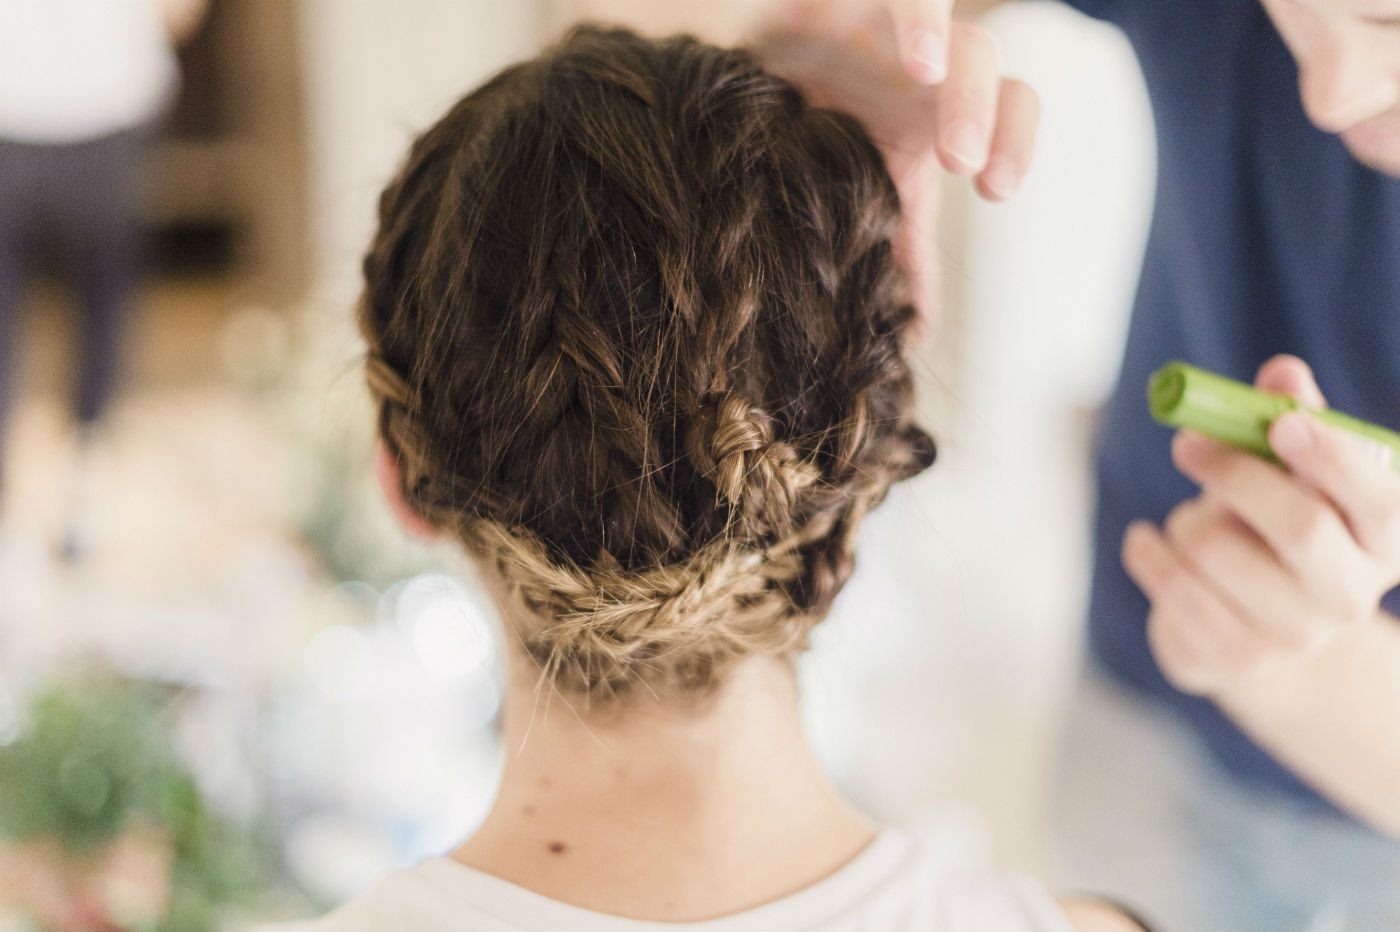
I tried it on twice before committing, once with my mum and another time with my best friends and then I had to wait a bit for my size to be ordered and delivered. Something I regret not doing is practising dancing and jumping around in it. When I went back to pick it up I realised how restricting the top was, I couldn't lift my arms up and I
really didn't want to be the sort of bride that couldn't let loose and dance. I loved the outfit though so I looked into the option of changing my top for the party.
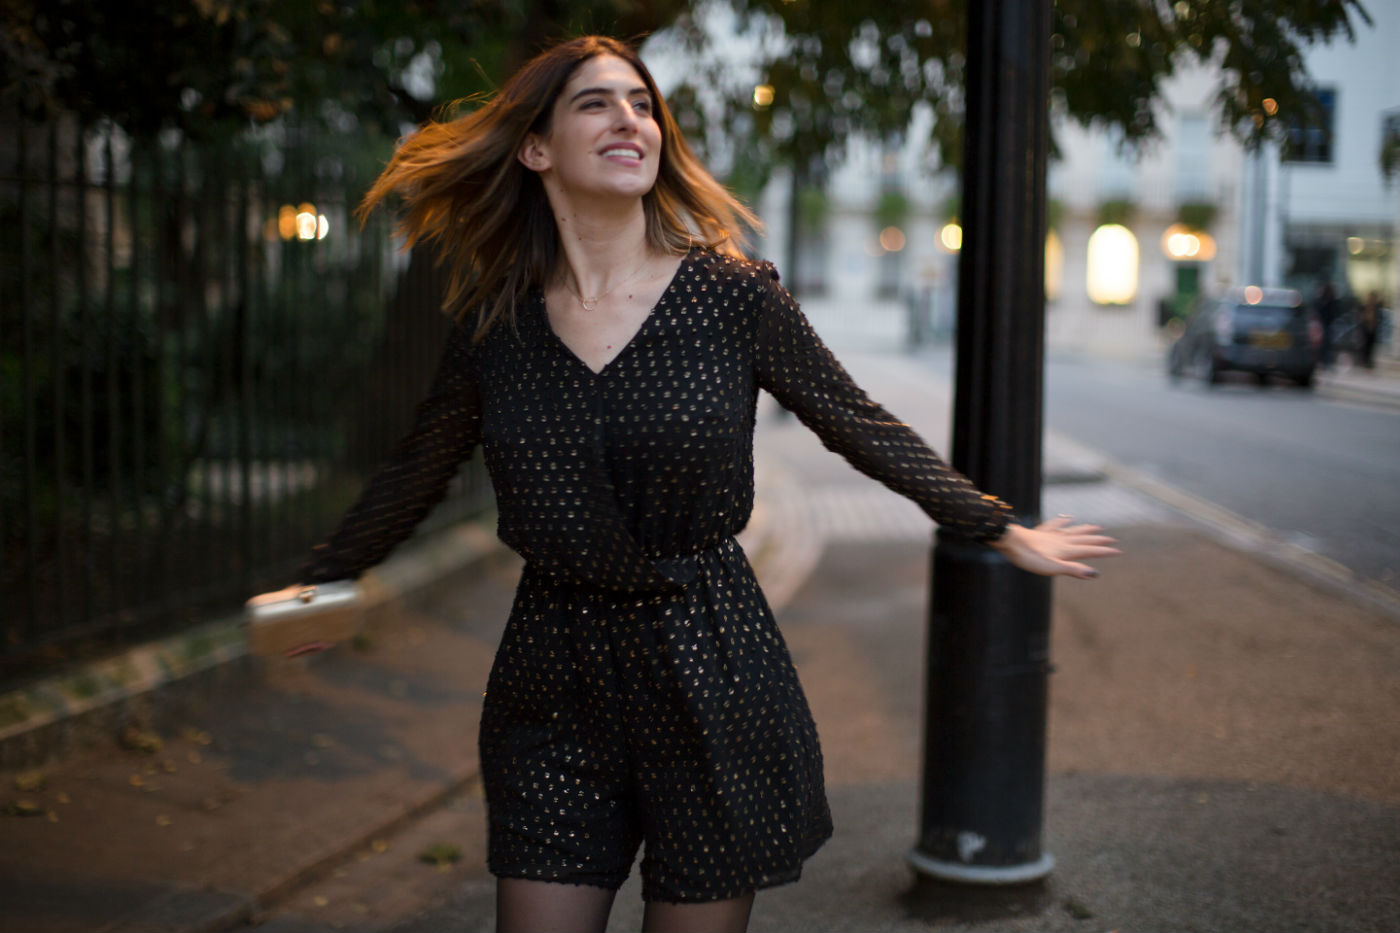
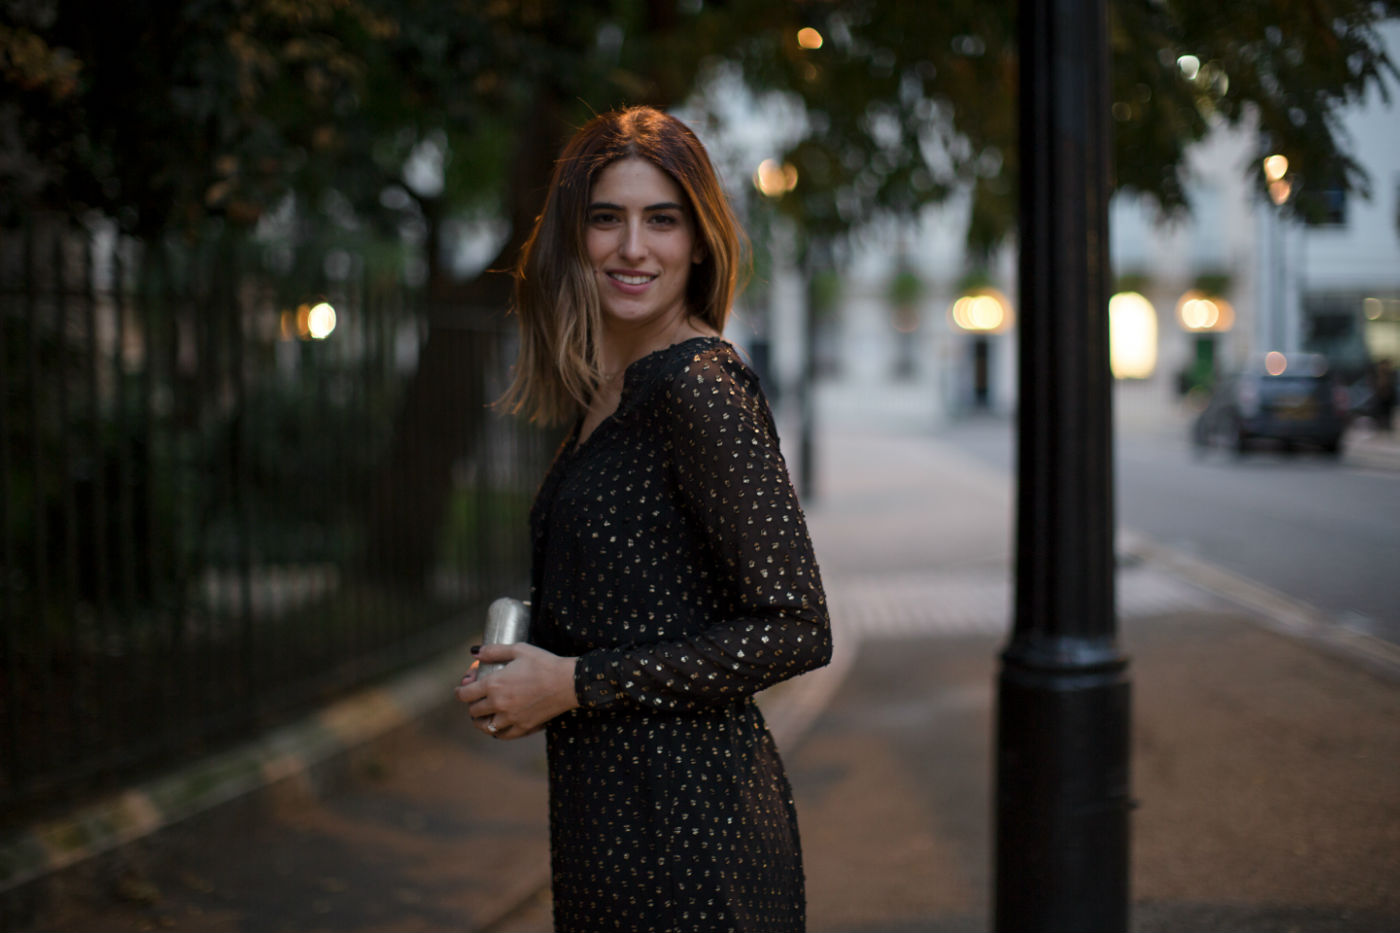
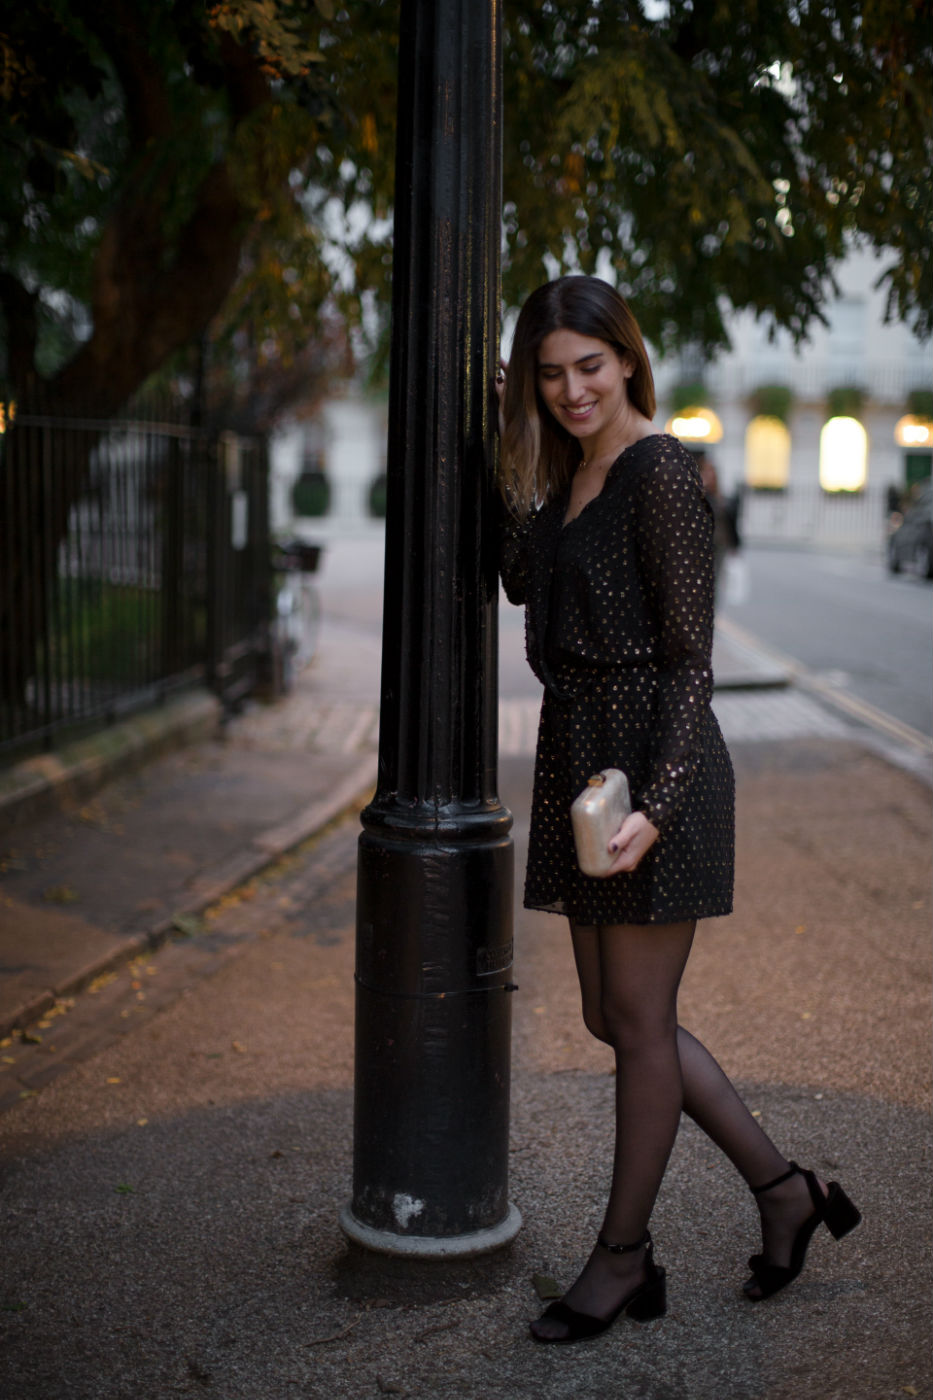
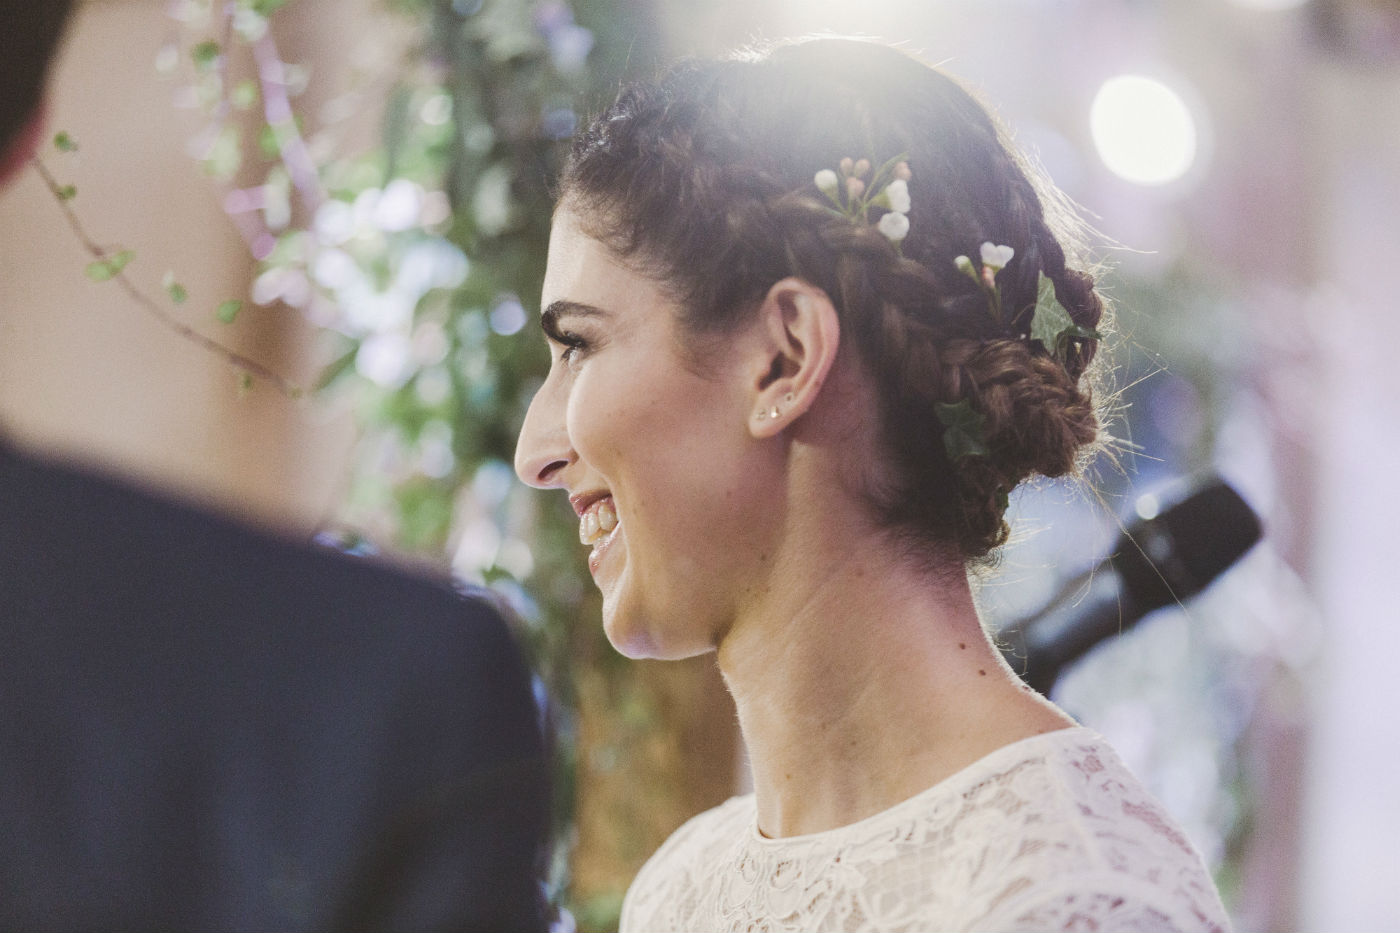
Needle & Thread have an amazing range of wedding pieces and they kindly gifted me the
Victorian Lace Top. The beaded top went really well with the skirt and added more of a party vibe to my outfit. Also, I was able to dance....
hard core dance.
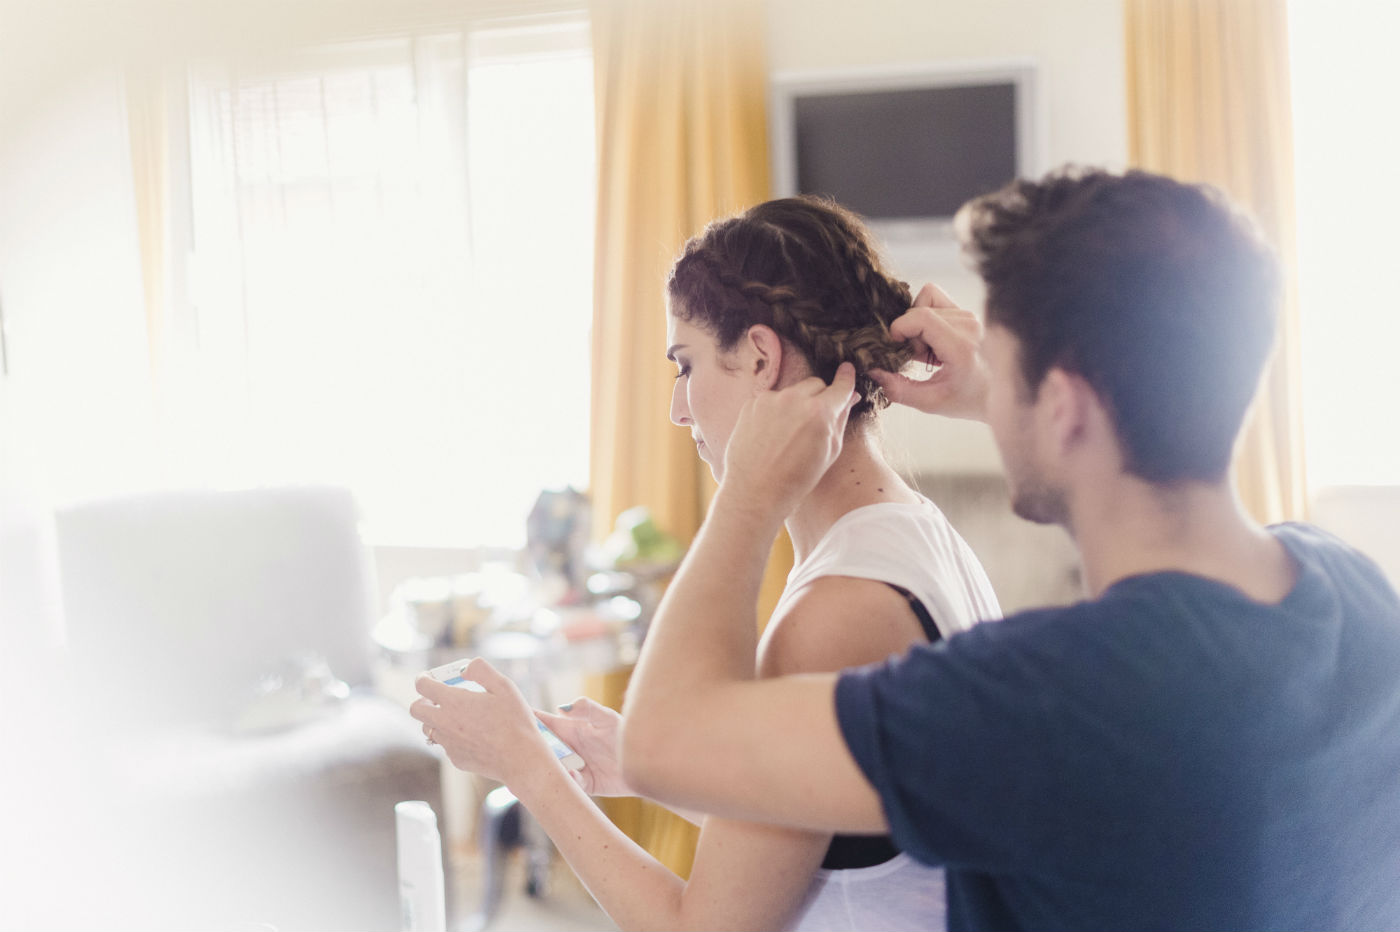
I did need some alterations though, so I went to Julia Dee at
The Wardrobe Curator. She was incredibly helpful and patient, I think when it comes to something so important like your wedding outfit you should only use someone you trust and feel comfortable with. I've heard awful stories about people having unpleasant alteration experiences so I'm so happy Julia was such a pleasure to work with. I visited her a couple of times, she took up the bottom of my skirt and took it in at the waist so it sat higher on my waist. She also had to take in the bodice so it fitted really well and I wouldn't feel the need to lift it up (or wear a bra!), she also added some clear straps for a bit of lift and security. I decided to sew the skirt to the bodice so there was no chance of them coming apart as I didn't want my stomach to show. This also meant it was really easy for me to step into it like a dress and made transporting it simpler too. The lace top was perfect so didn't need any alterations but I did take the Needle & Thread top in slightly at the sides so it fitted better. This was a bit of an unnecessary step that you would't
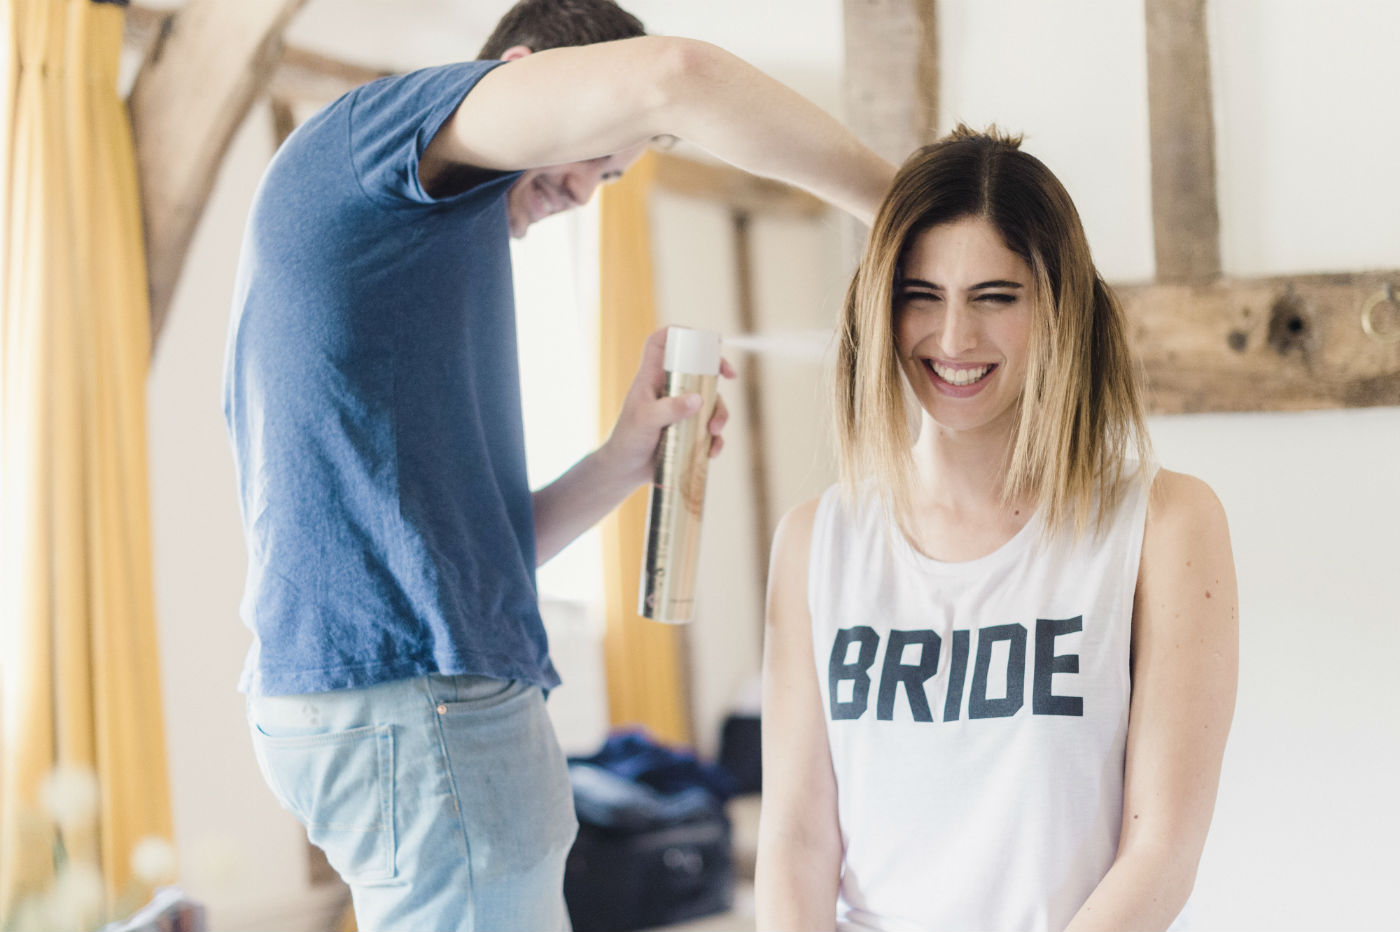
need to do but I wanted it more fitted and Julia did an incredible job with the complicated beading work. Changing tops in the toilet with my friends Anna and Debs was such a funny memory, we were all so giddy and excited, I think I just jumped up and down for 10 minutes.
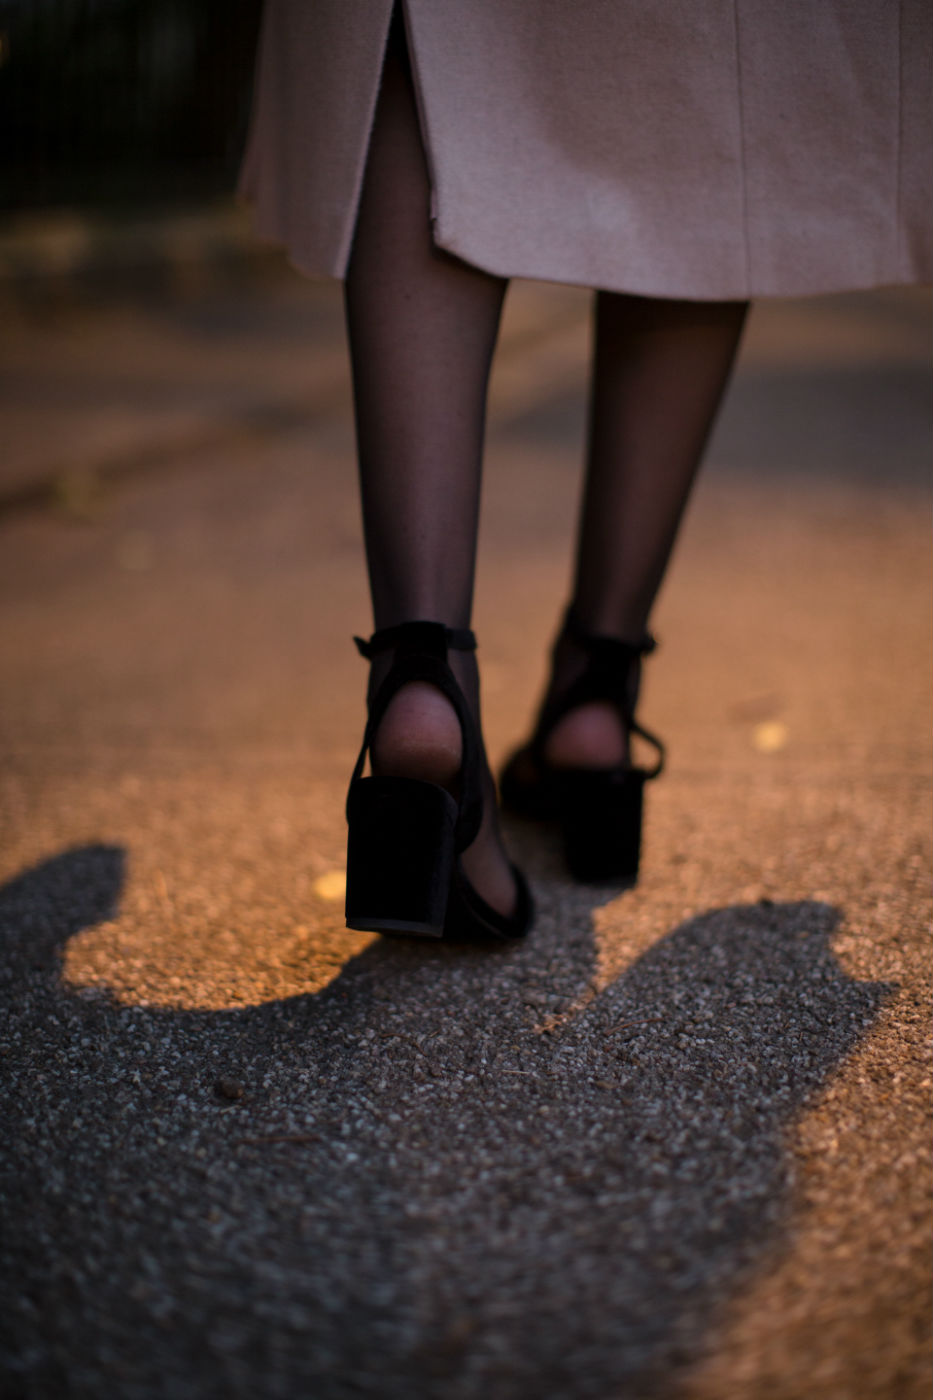
I wasn't that fussed with shoes, comfort was key. I chose some grey, low, chunky heeled sandals from Steve Madden and changed into my white converse at around 10.30pm.
Rich wore a blue wool suit from
Oscar Milo which we found in their shop in Spitalfields. He chose to wear a patterned, linen-blend shirt from
Ted Baker with a blue brushed cotton tie from ASOS. He was obsessed with these shoes he found from
Justine Reece and the whole thing came together really well. He didn't want to wear a traditional suit so finding all the pieces to work together took a while but was worth it.
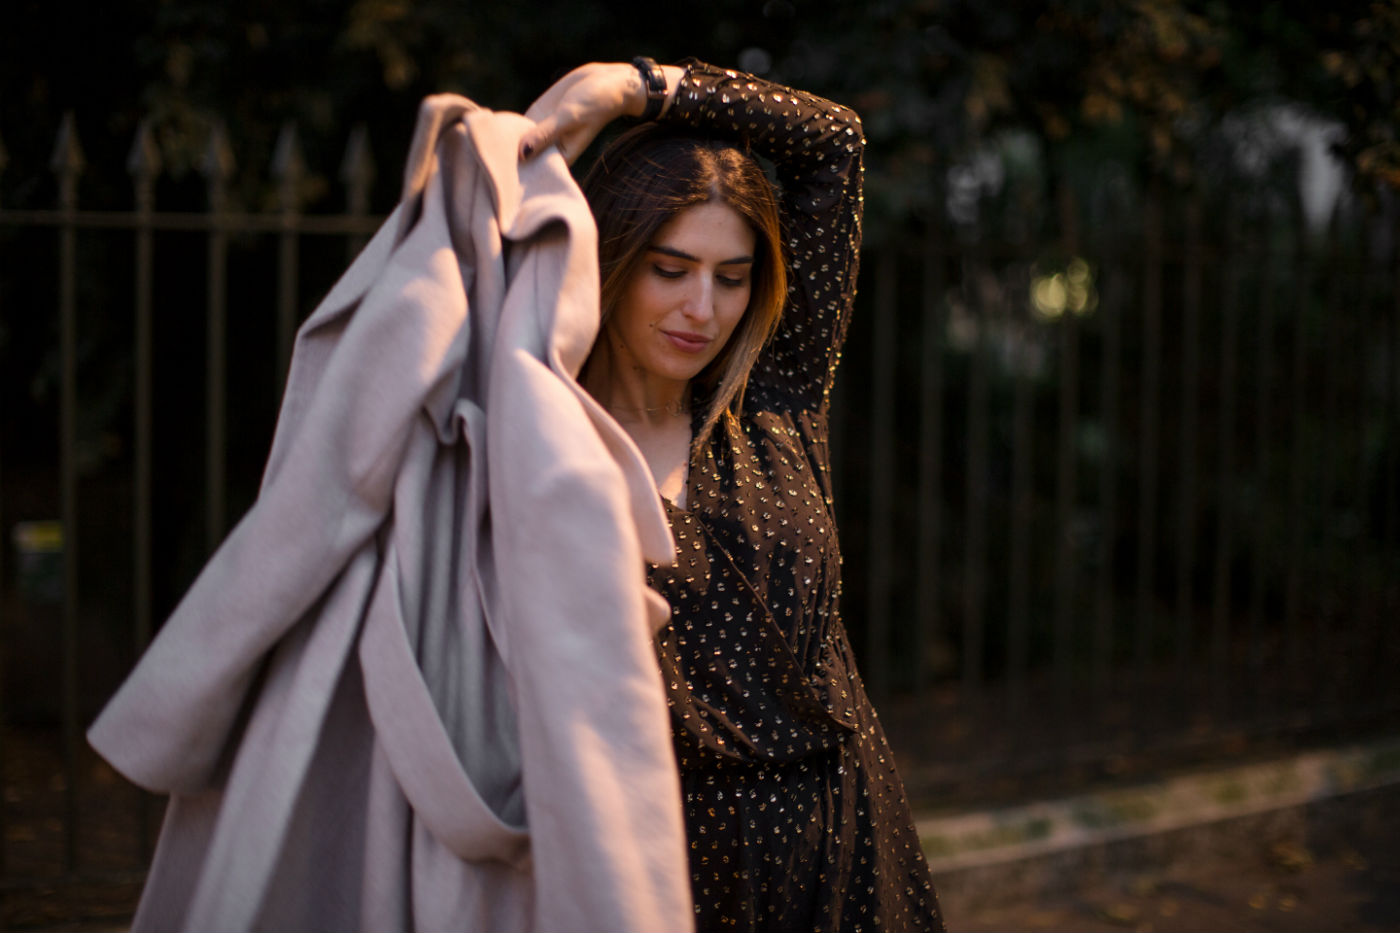
We both felt really happy and comfortable in our outfits and if I could do it again I wouldn't change a thing. I hope you've liked seeing some more photos!
Photos by
Razia Jukes.


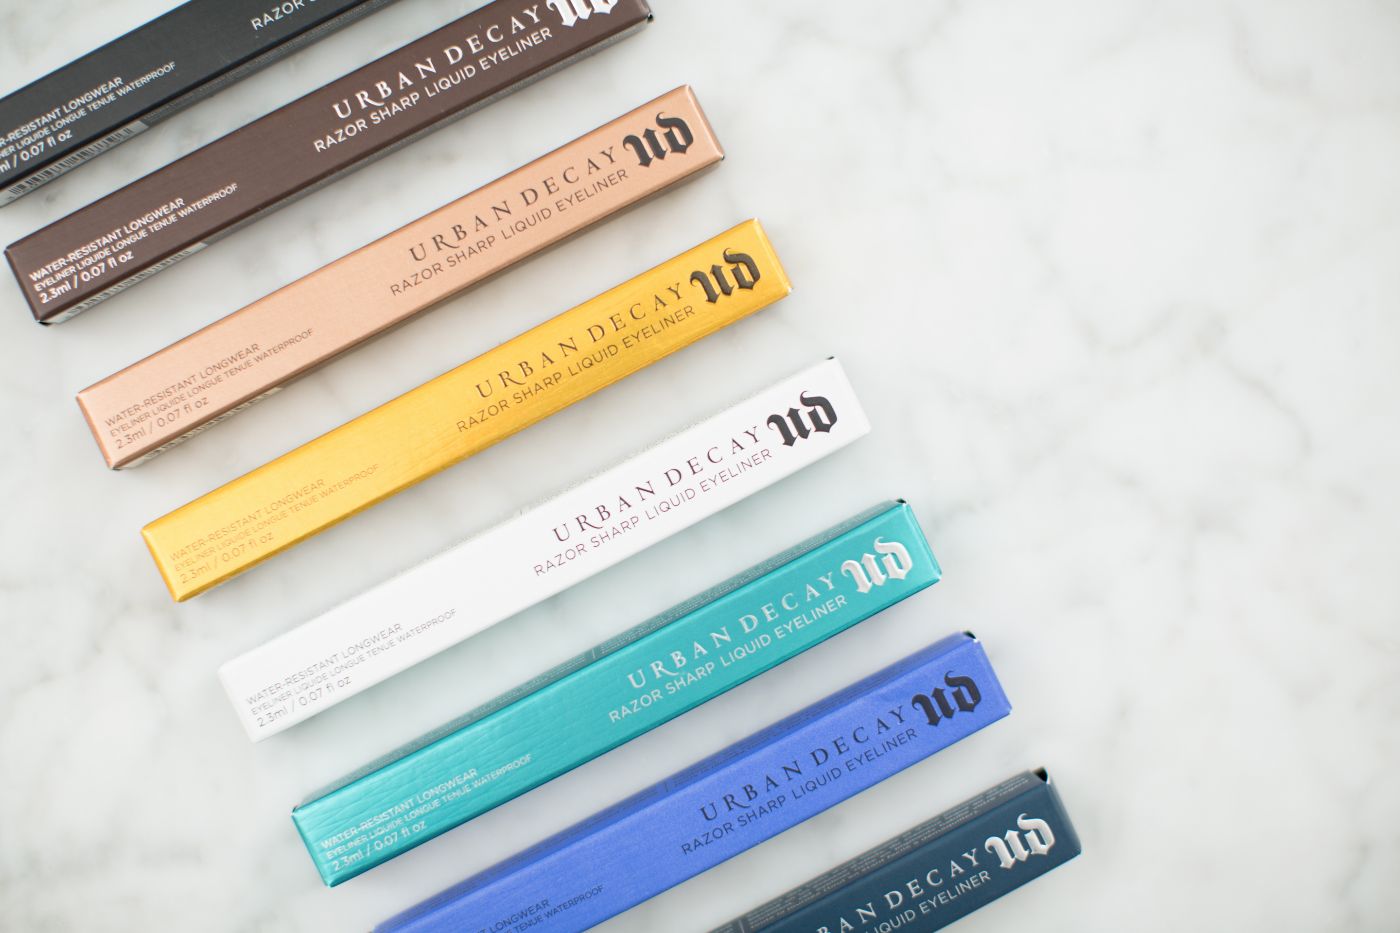
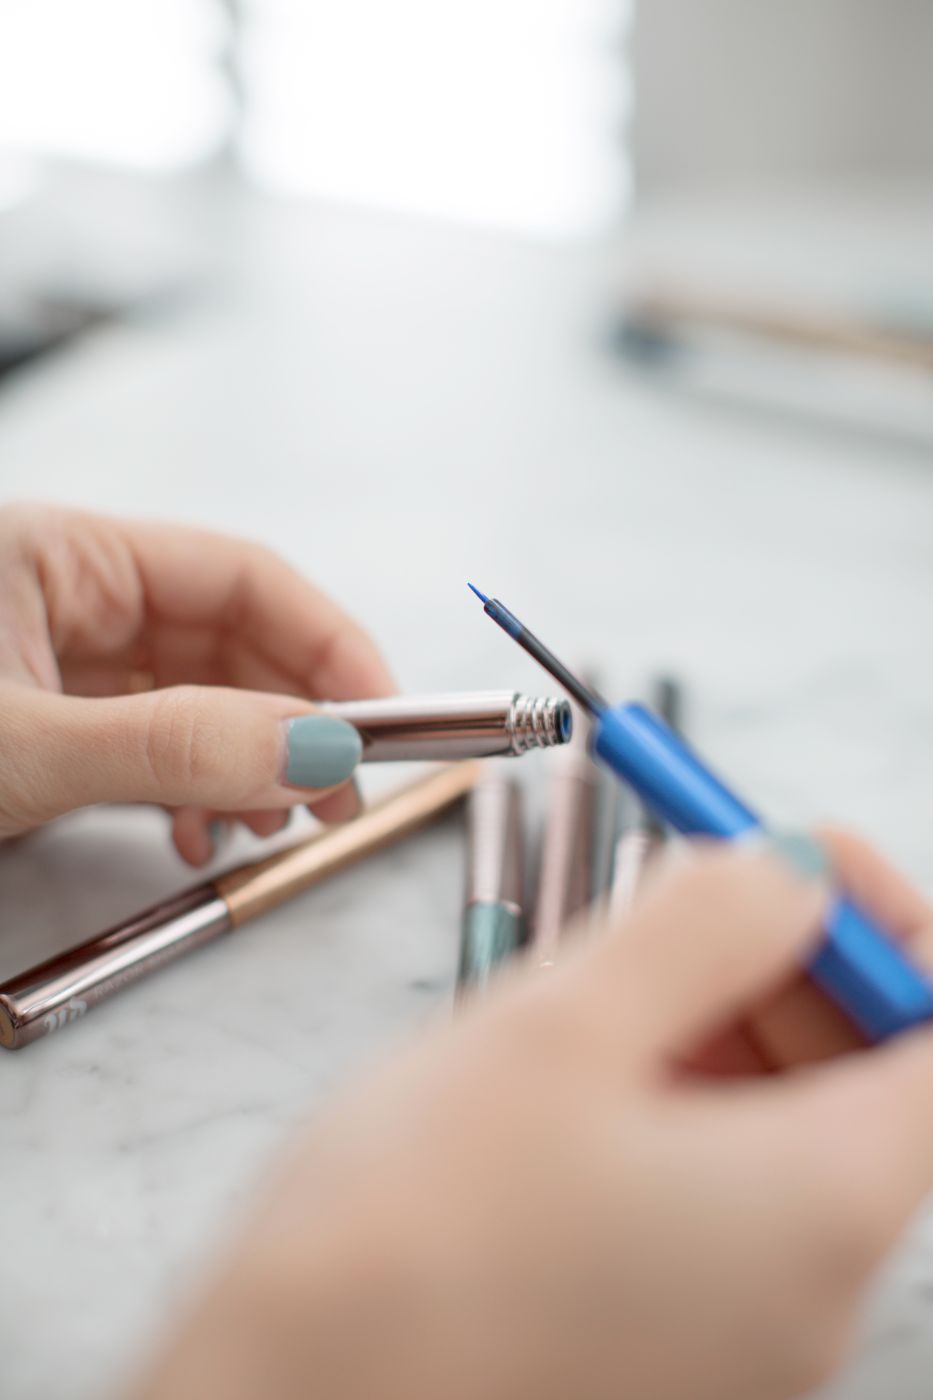
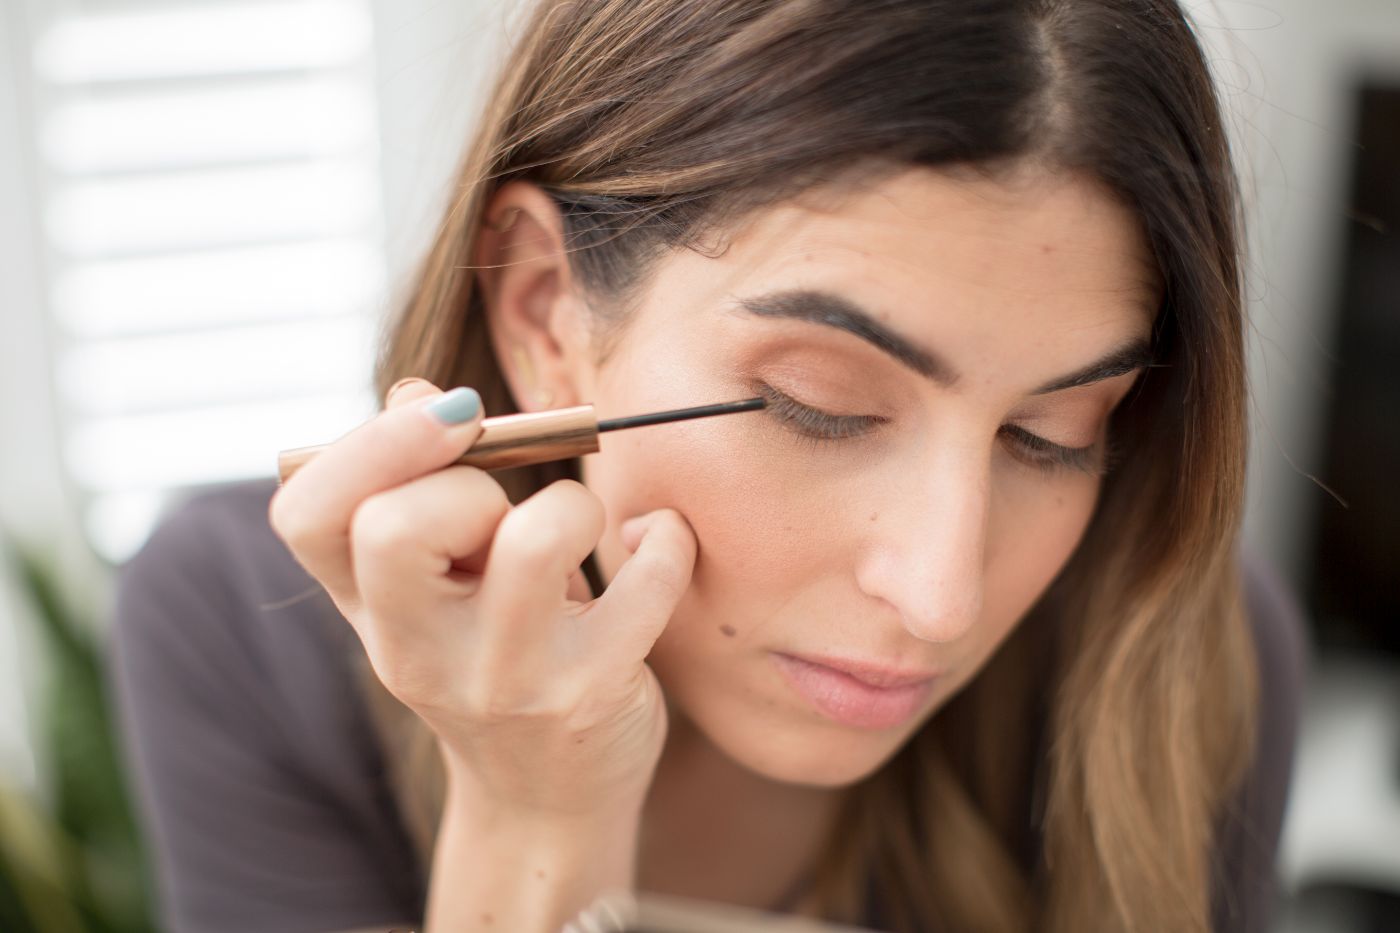
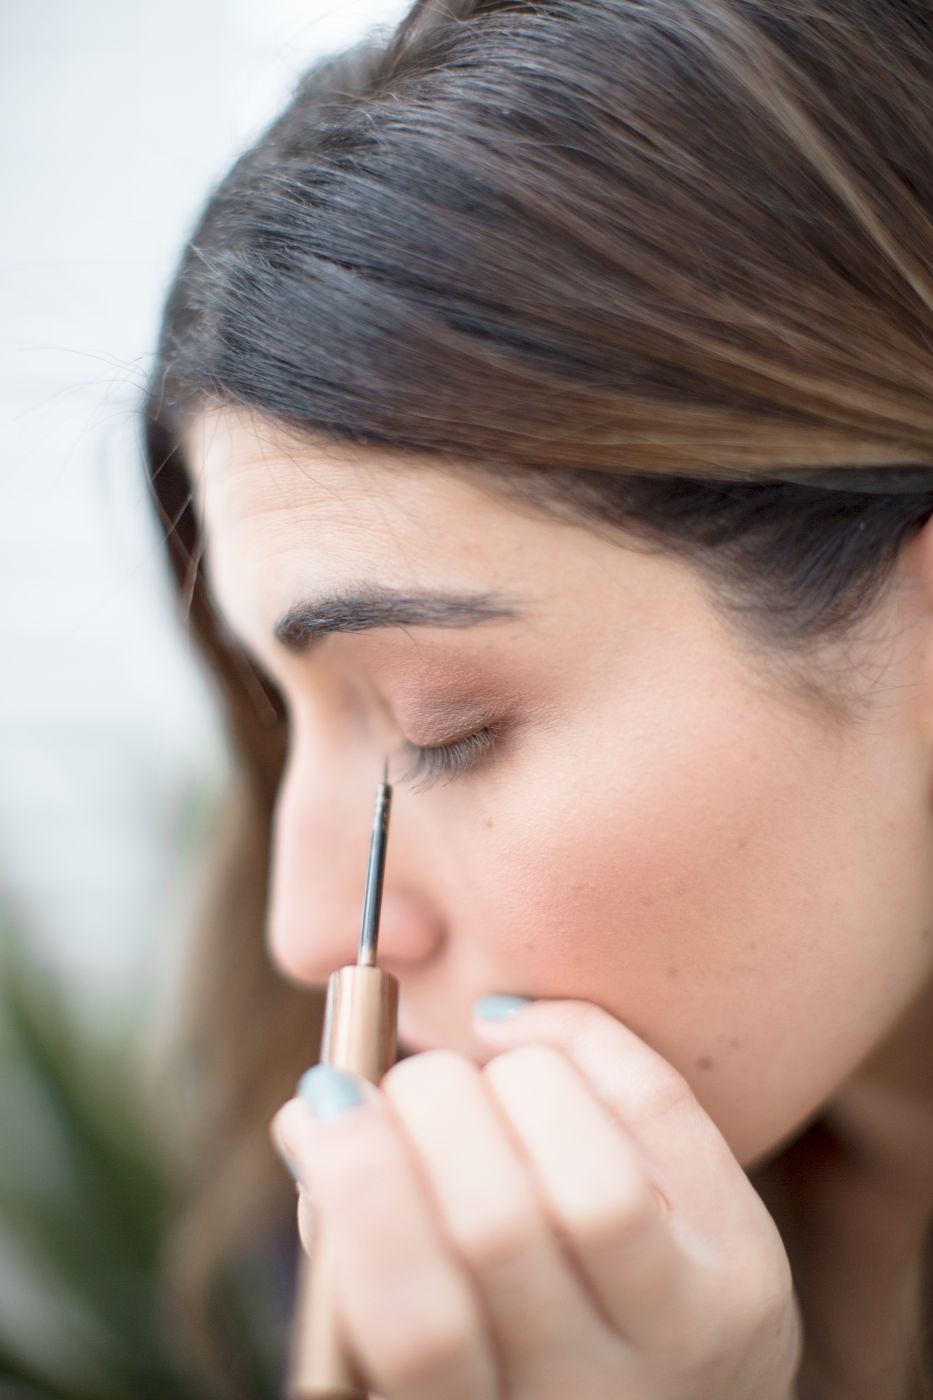
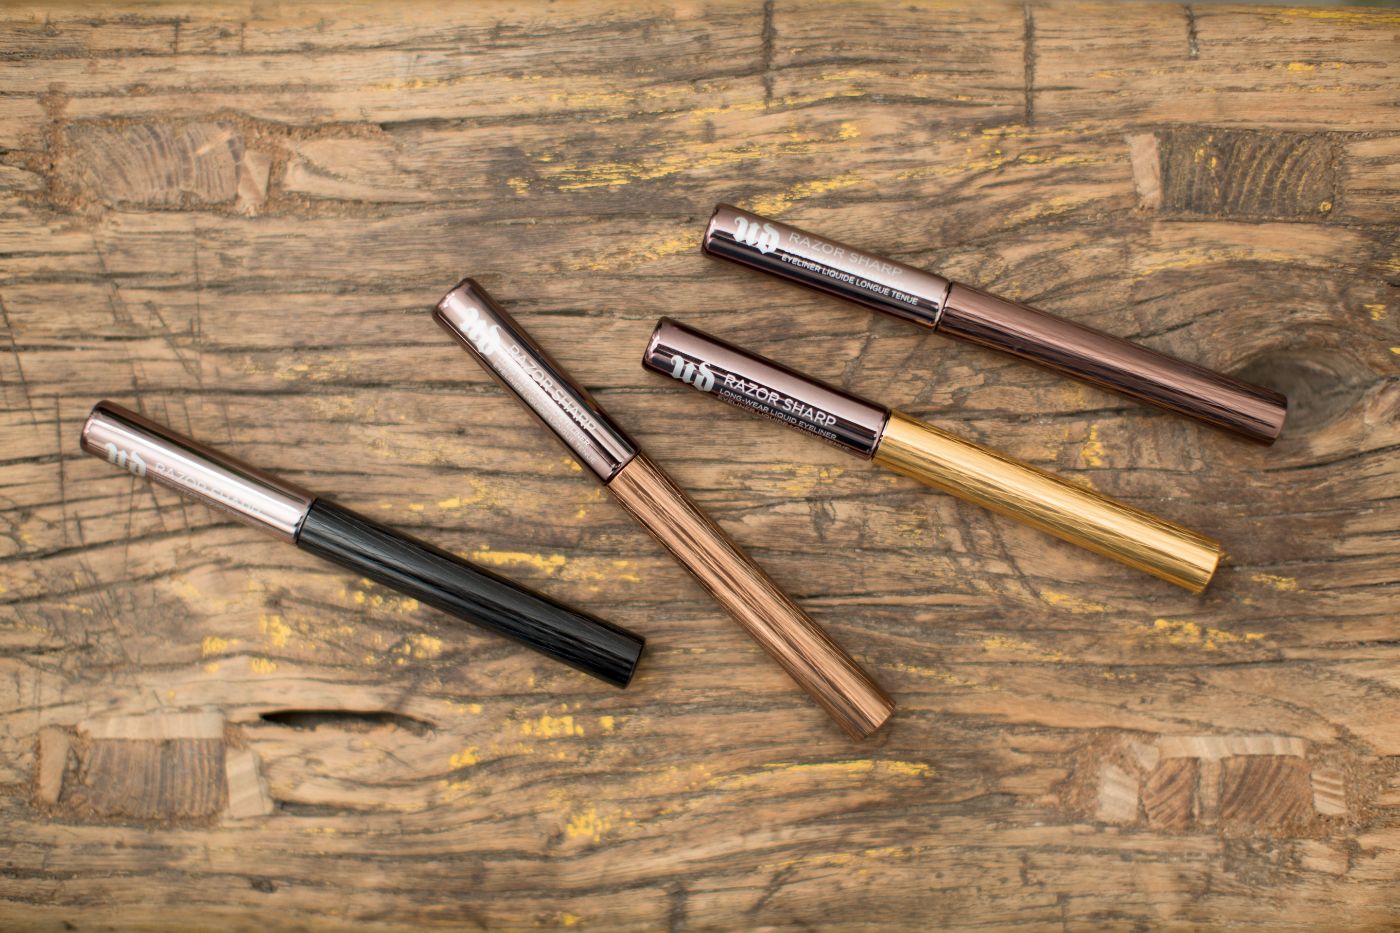
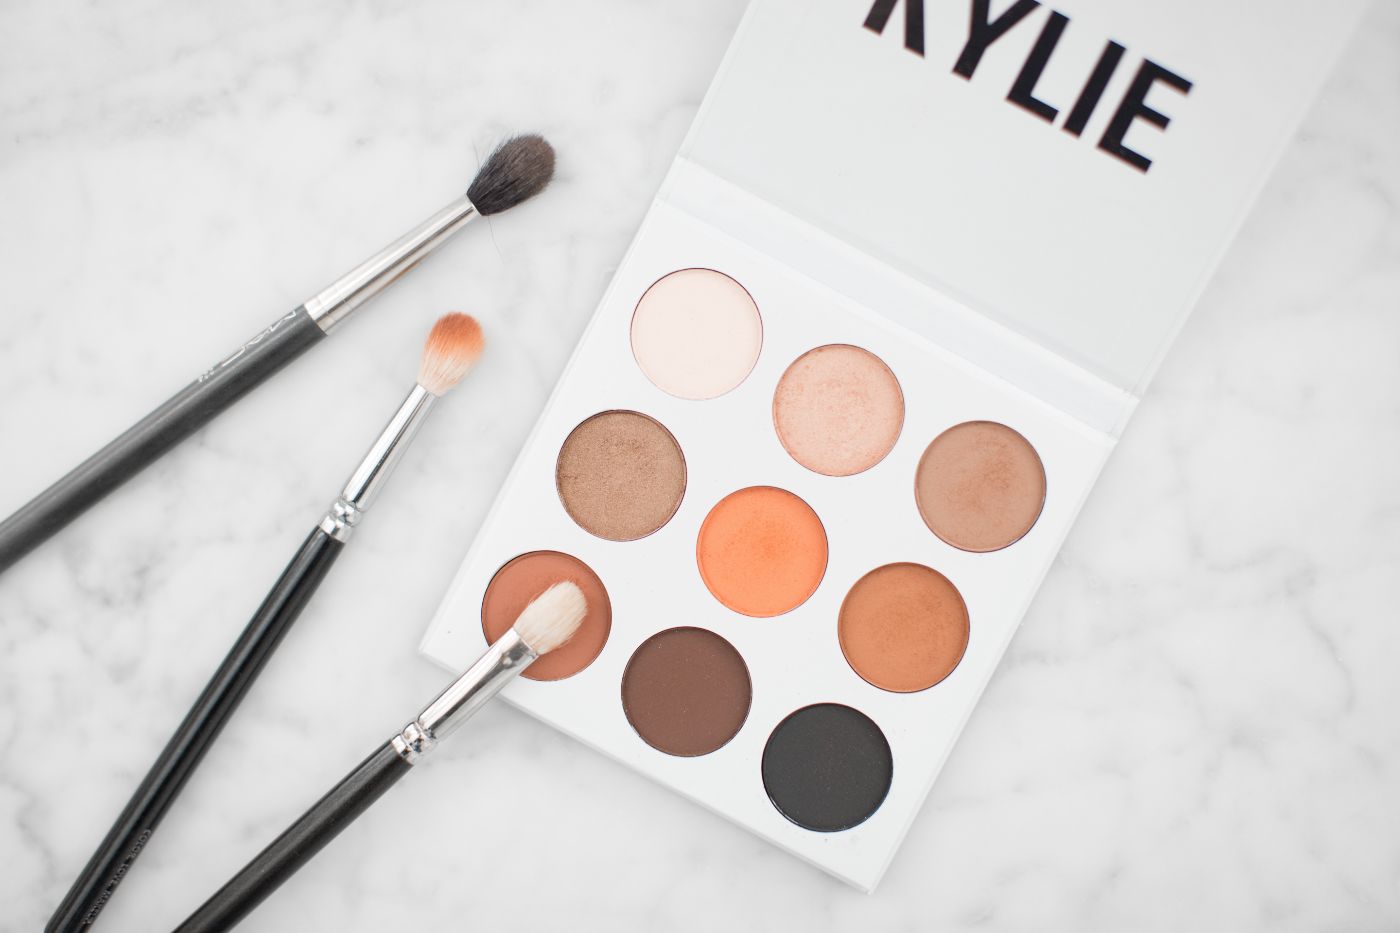
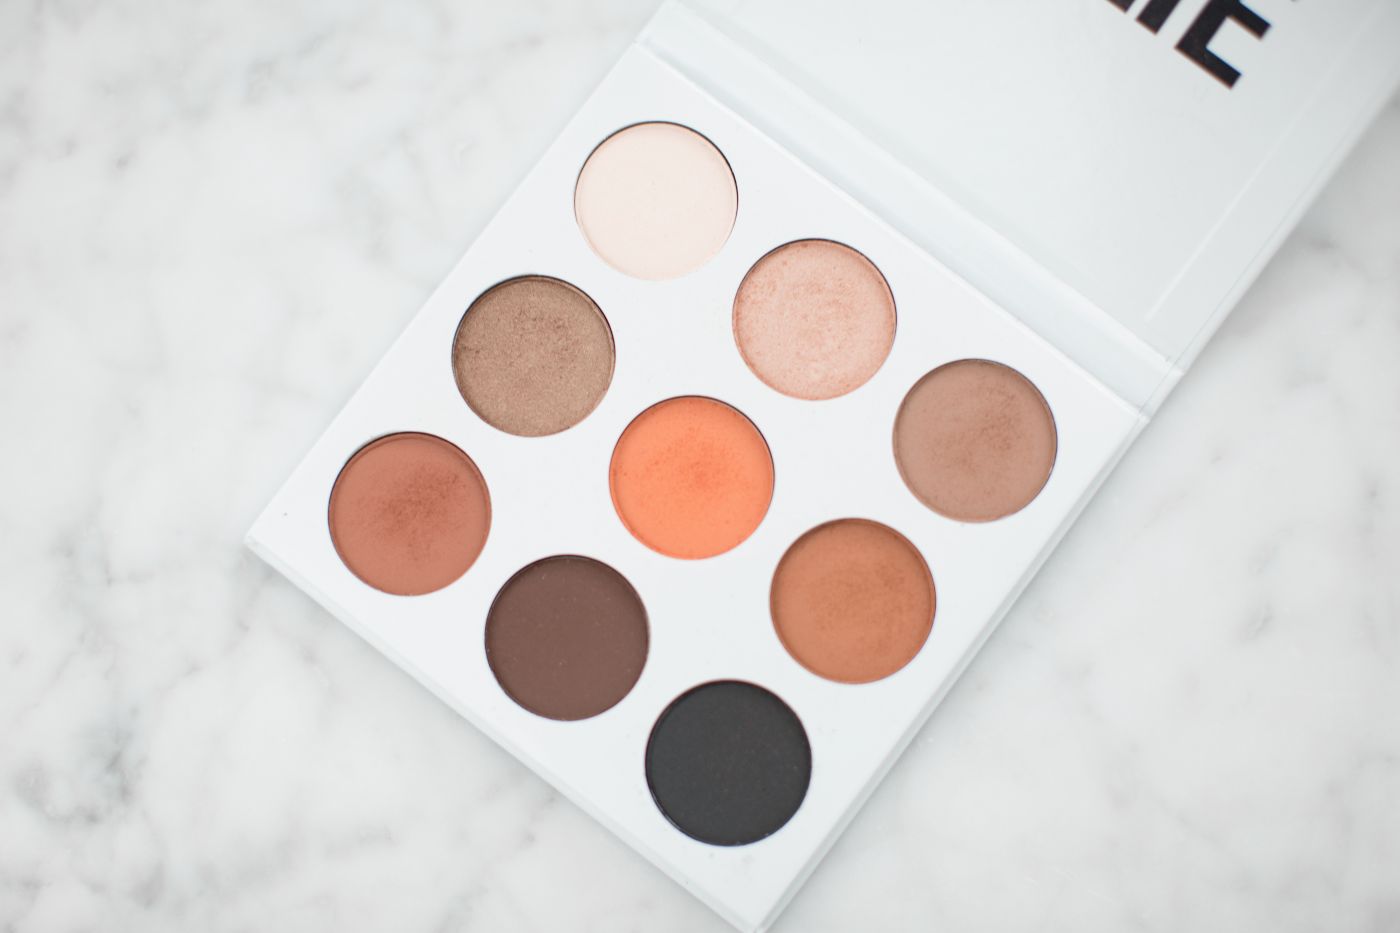
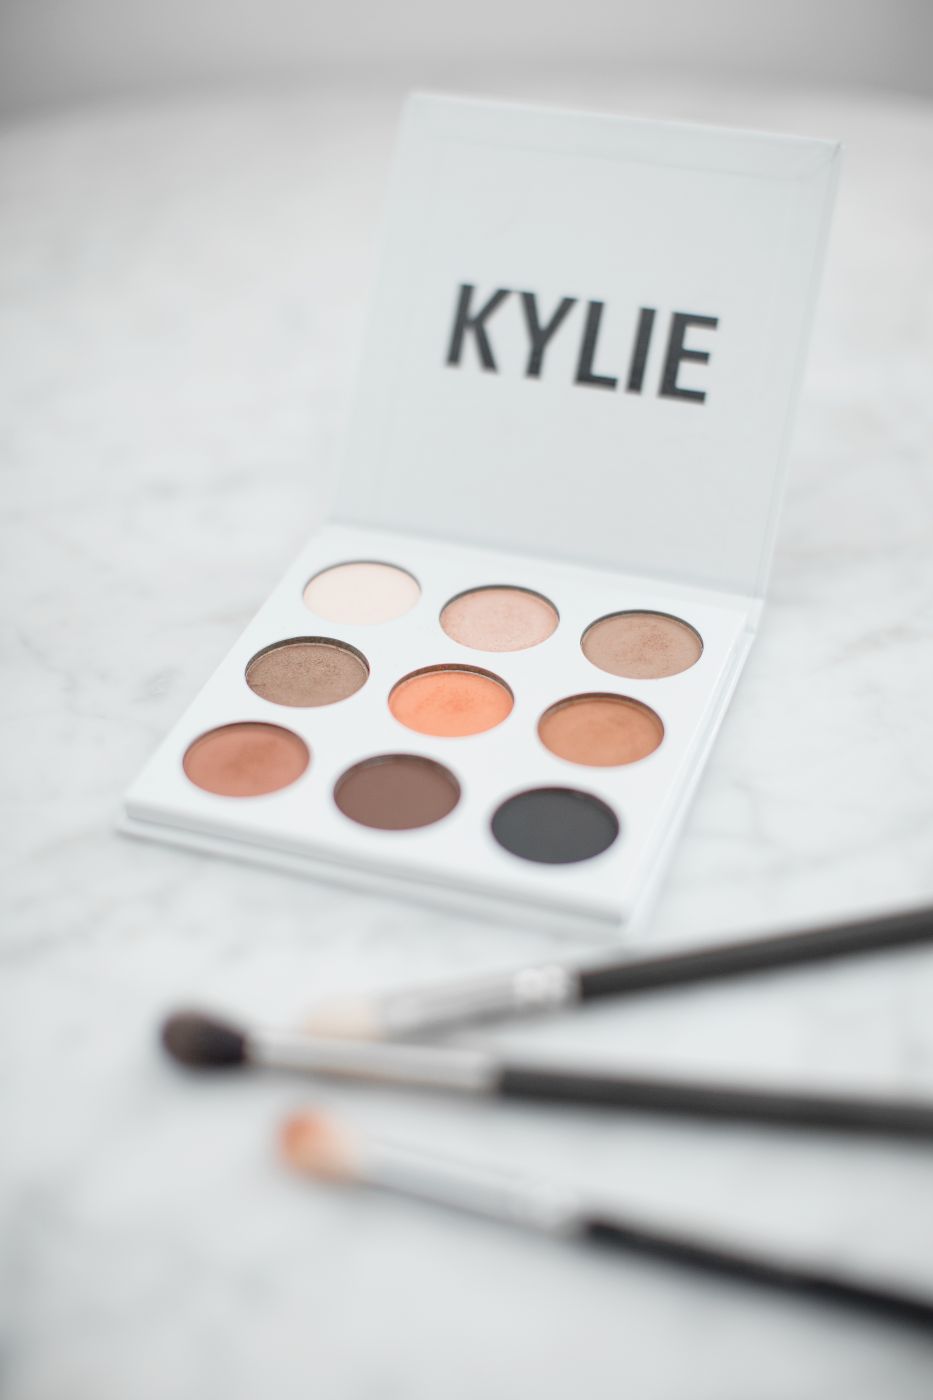
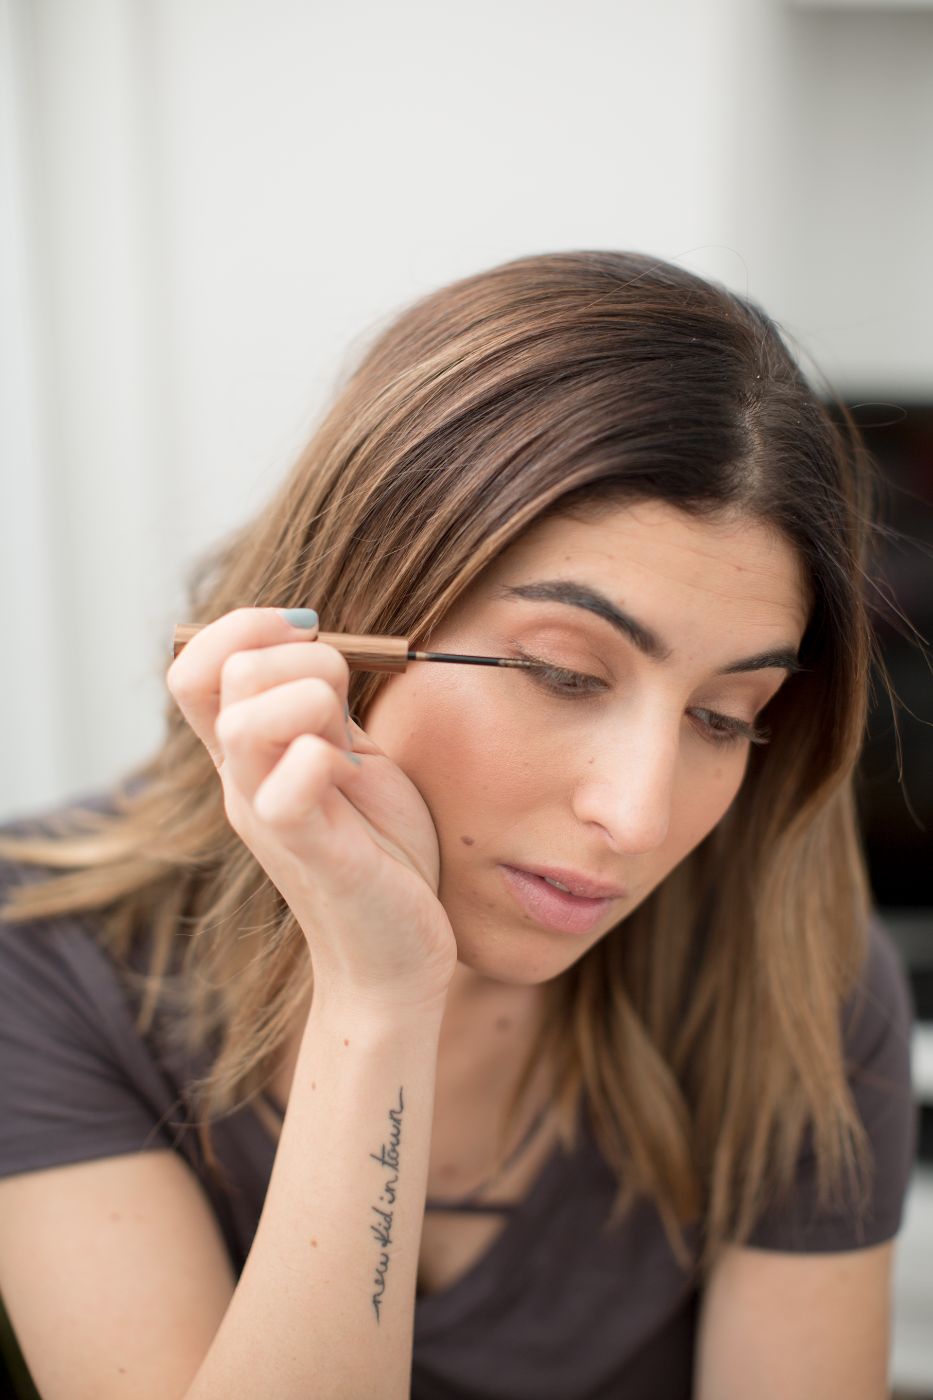 When Urban Decay bring out new products there's always a buzz within the beauty industry. I'm rarely disappointed with their launches and this time round it was the promise of
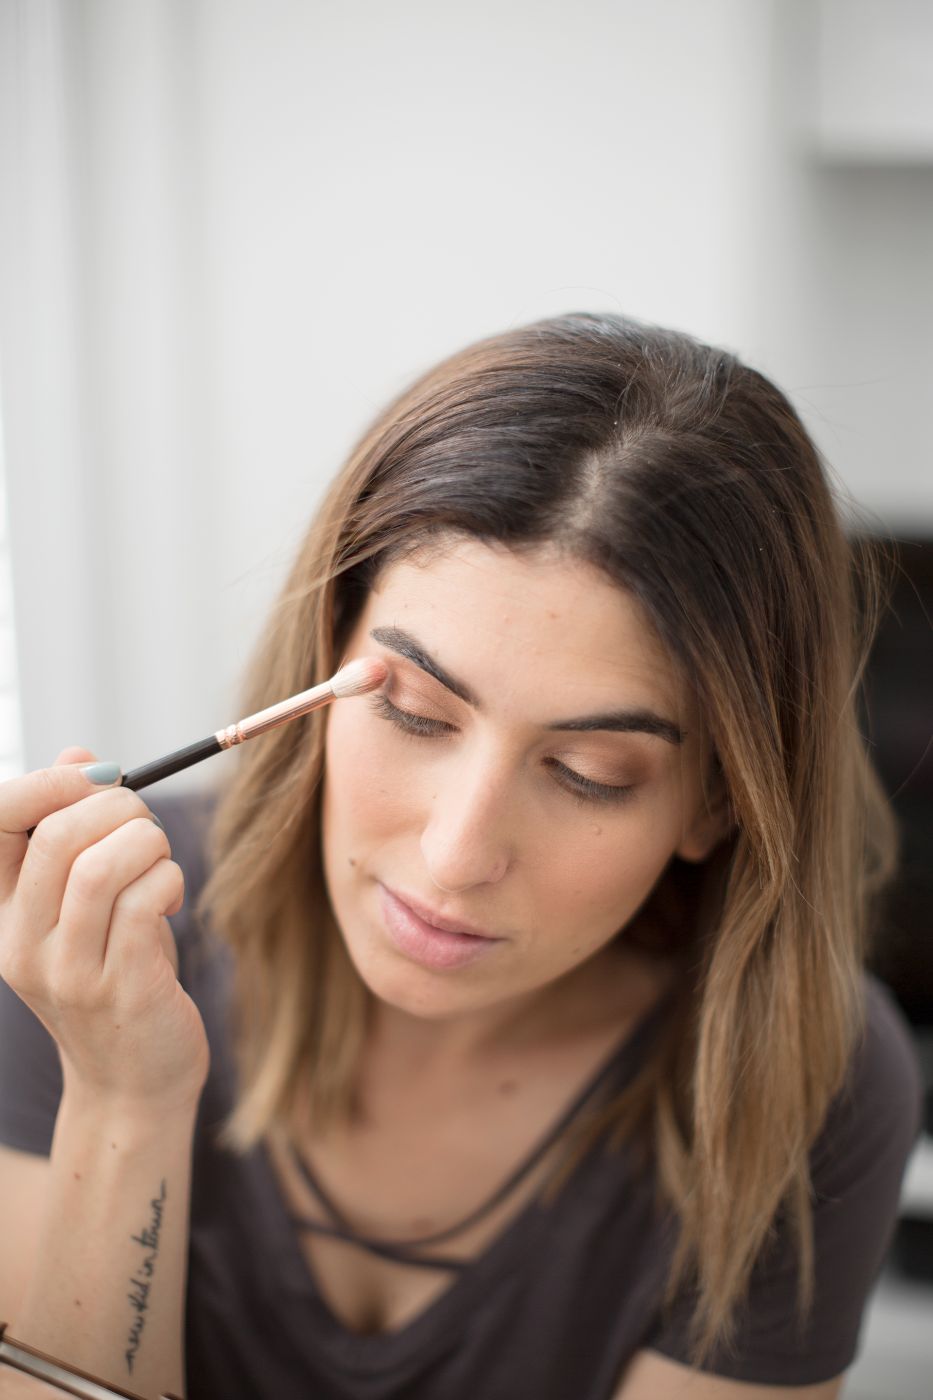


 [/column][/row][row][column sm="6"]
 [/column][column sm="6"]
 [/column][/row]
[row][column sm="12"]
[/column][/row]
[row][column sm="12"]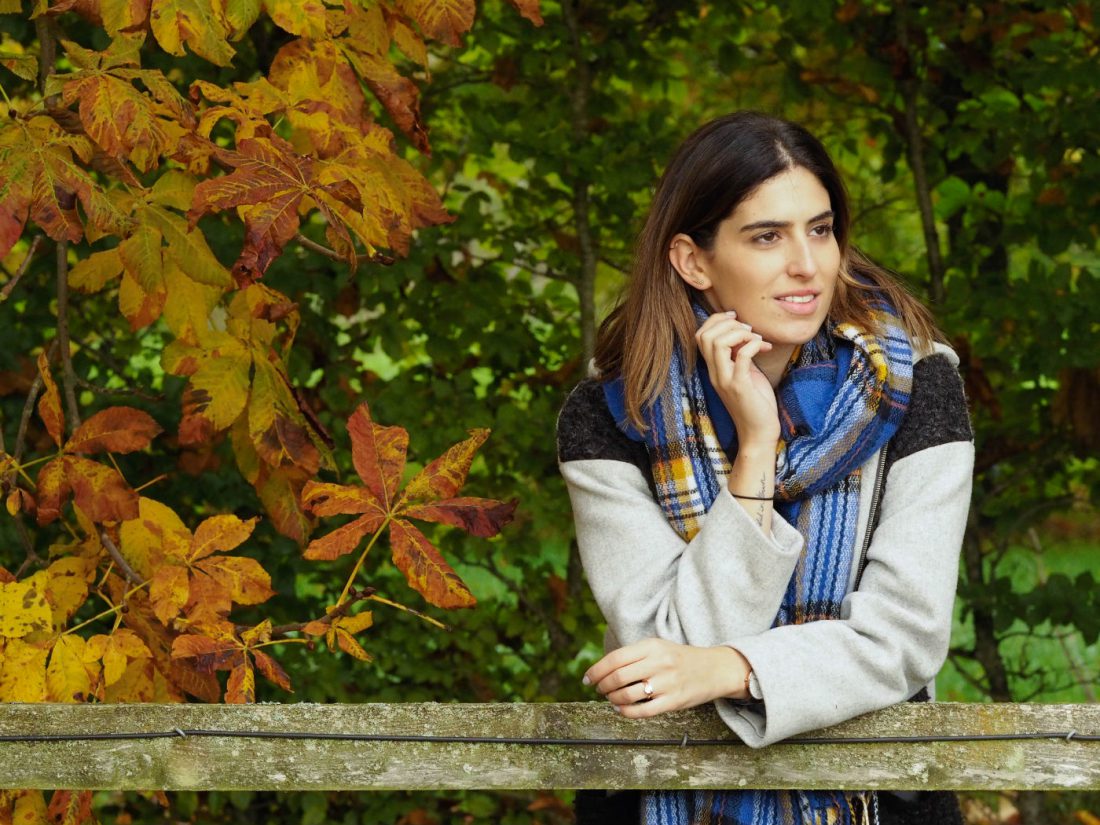 [/column][/row]
[row][column sm="6"]
[/column][/row]
[row][column sm="6"]
 [/column][column sm="6"]
 [/column][/row]
[row][column sm="12"]
[/column][/row]
[row][column sm="12"]
 [/column][/row]
[row][column sm="12"]
[/column][/row]
[row][column sm="12"]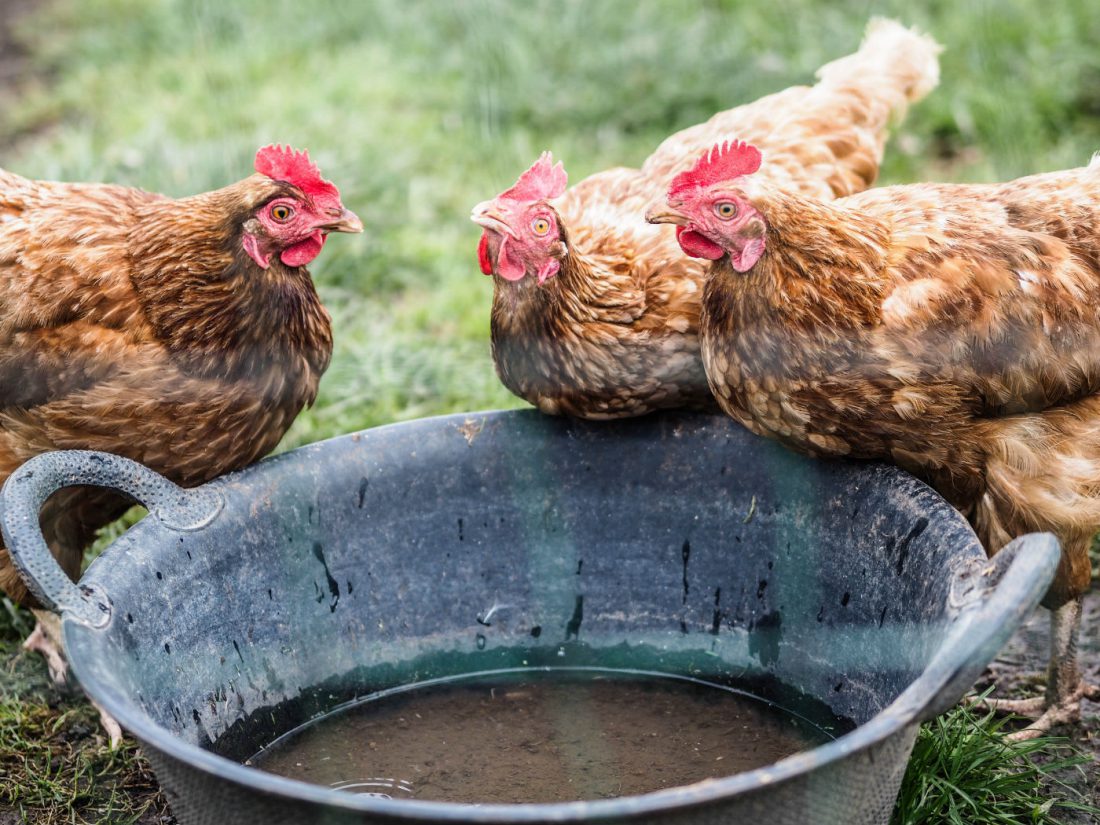 [/column][/row]
[row][column sm="12"]
[/column][/row]
[row][column sm="12"]
 [/column][/row]
[row][column sm="6"]
[/column][/row]
[row][column sm="6"]
 [/column][column sm="6"]
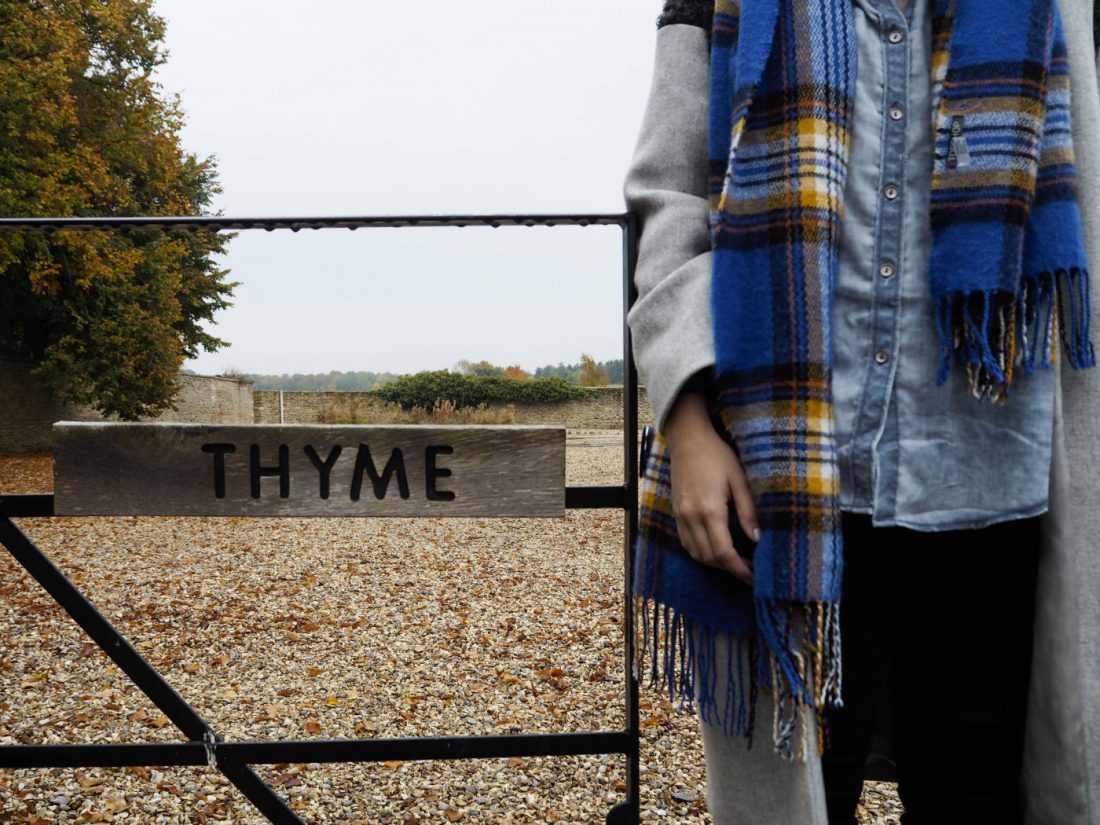
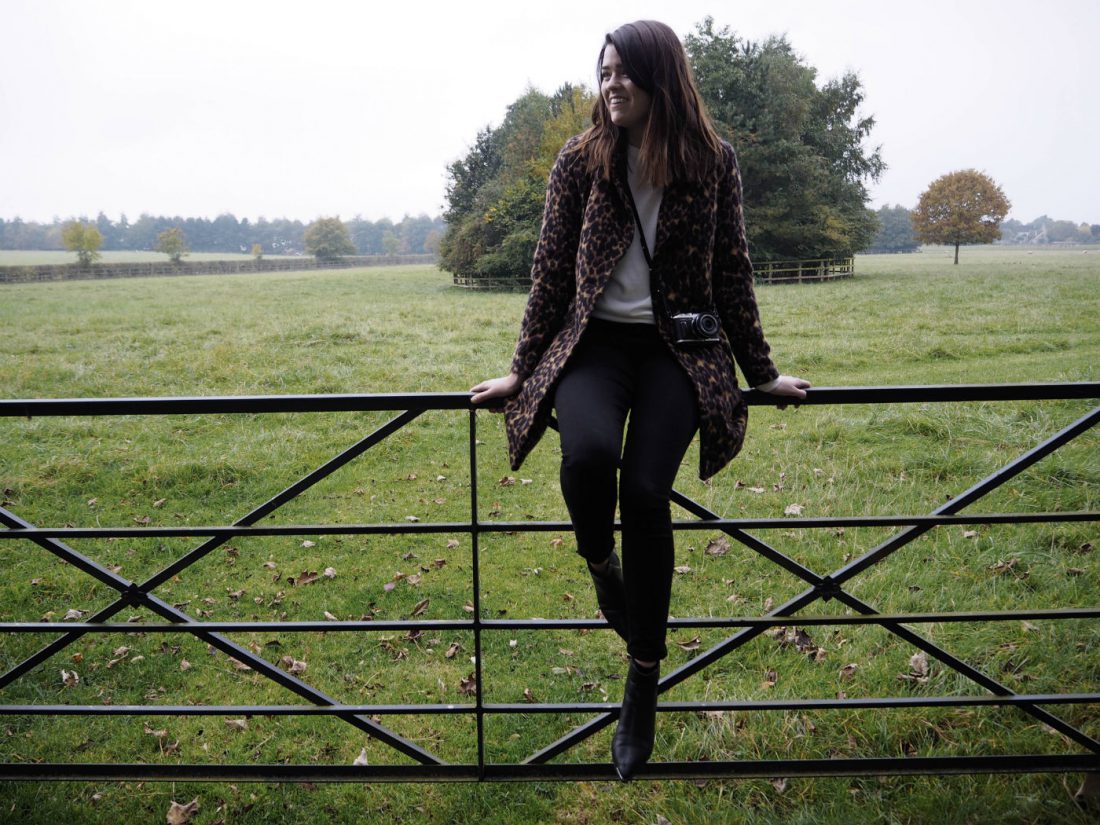
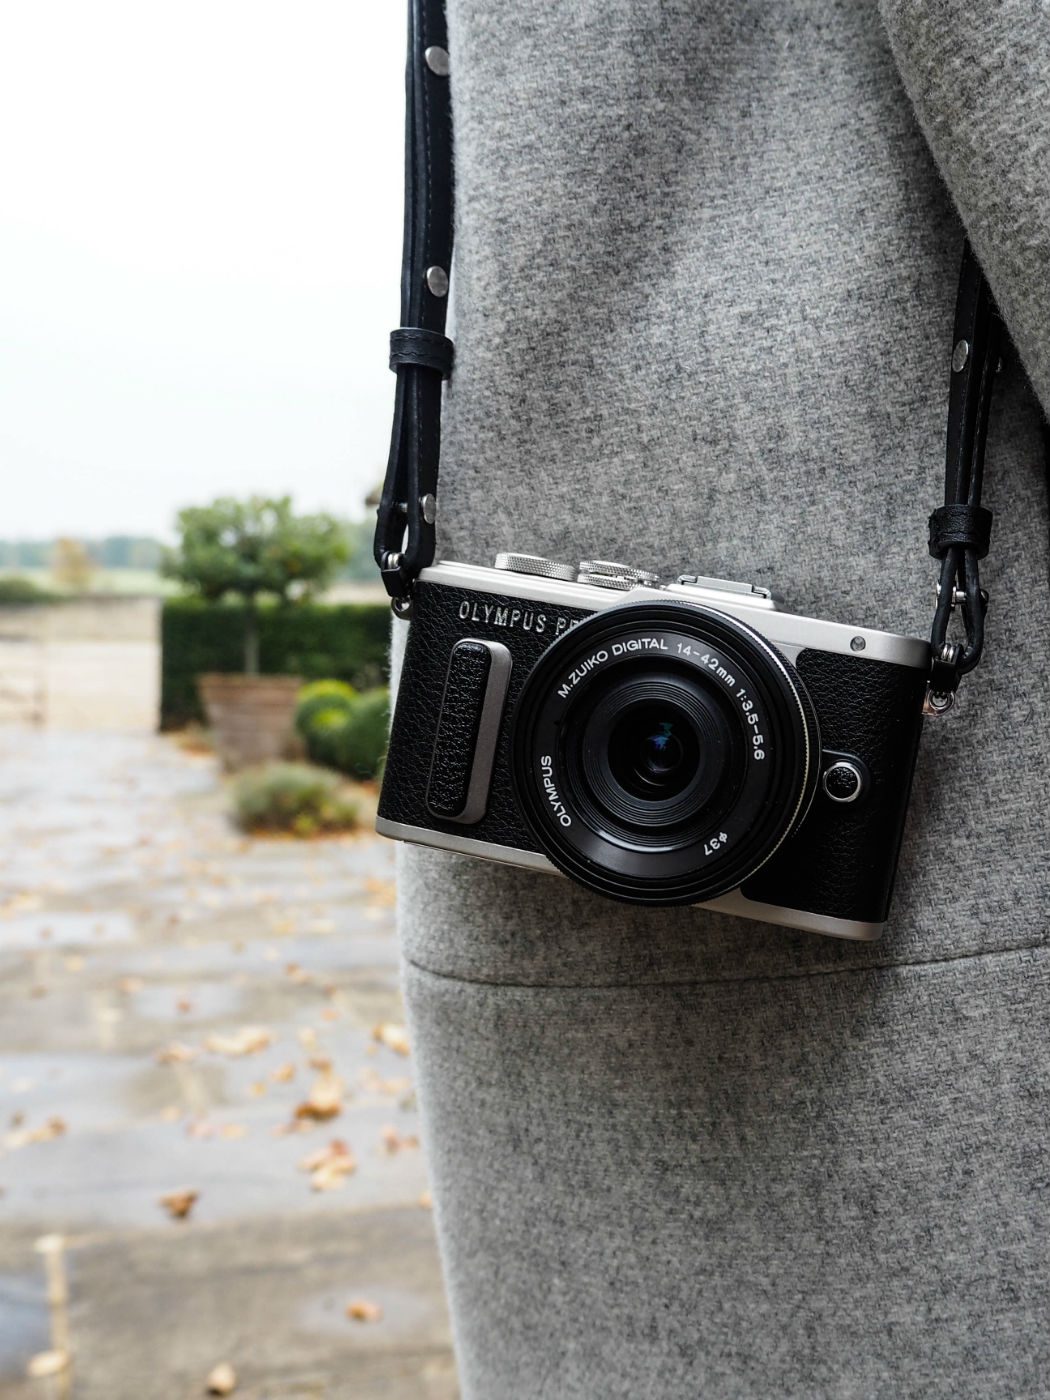
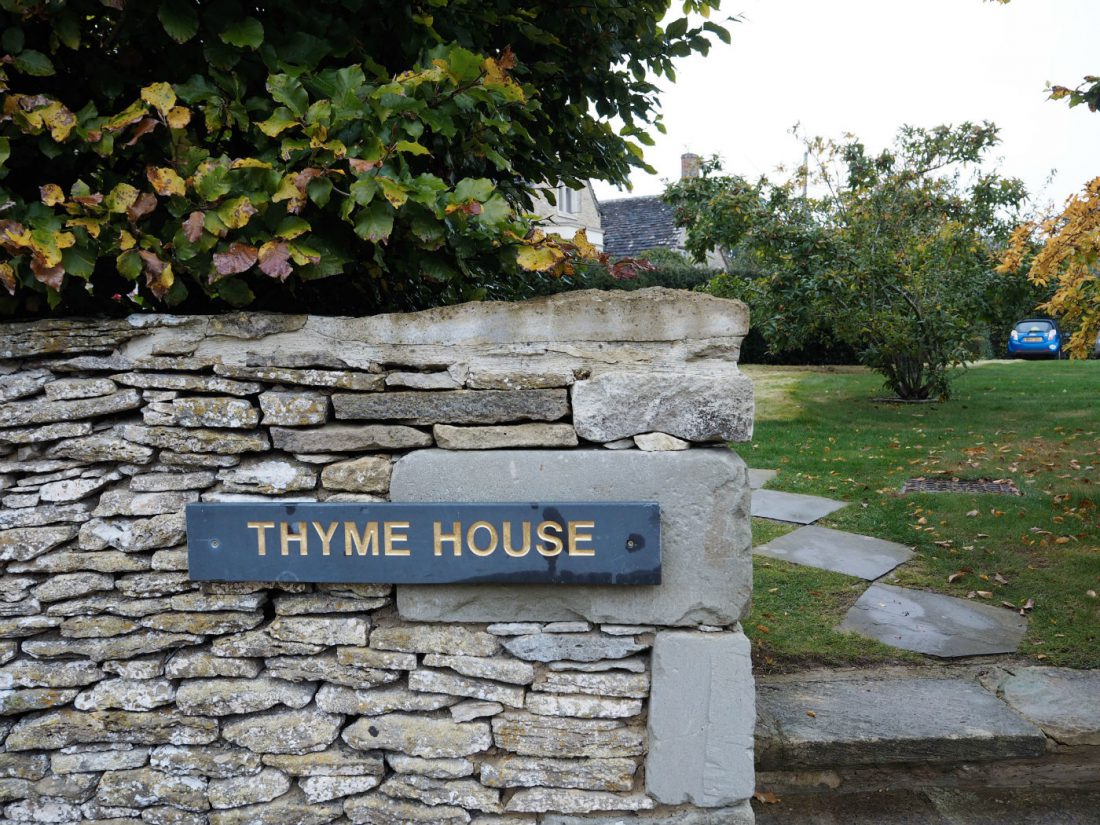
At the beginning of the week I was invited by Olympus to spend a couple of days in the Cotswolds at
[/column][column sm="6"]
At the beginning of the week I was invited by Olympus to spend a couple of days in the Cotswolds at  [/column][column sm="6"]
 [/column][/row]
[row][column sm="12"]
[/column][/row]
[row][column sm="12"]
 [/column][/row]
[row][column sm="12"]
[/column][/row]
[row][column sm="12"]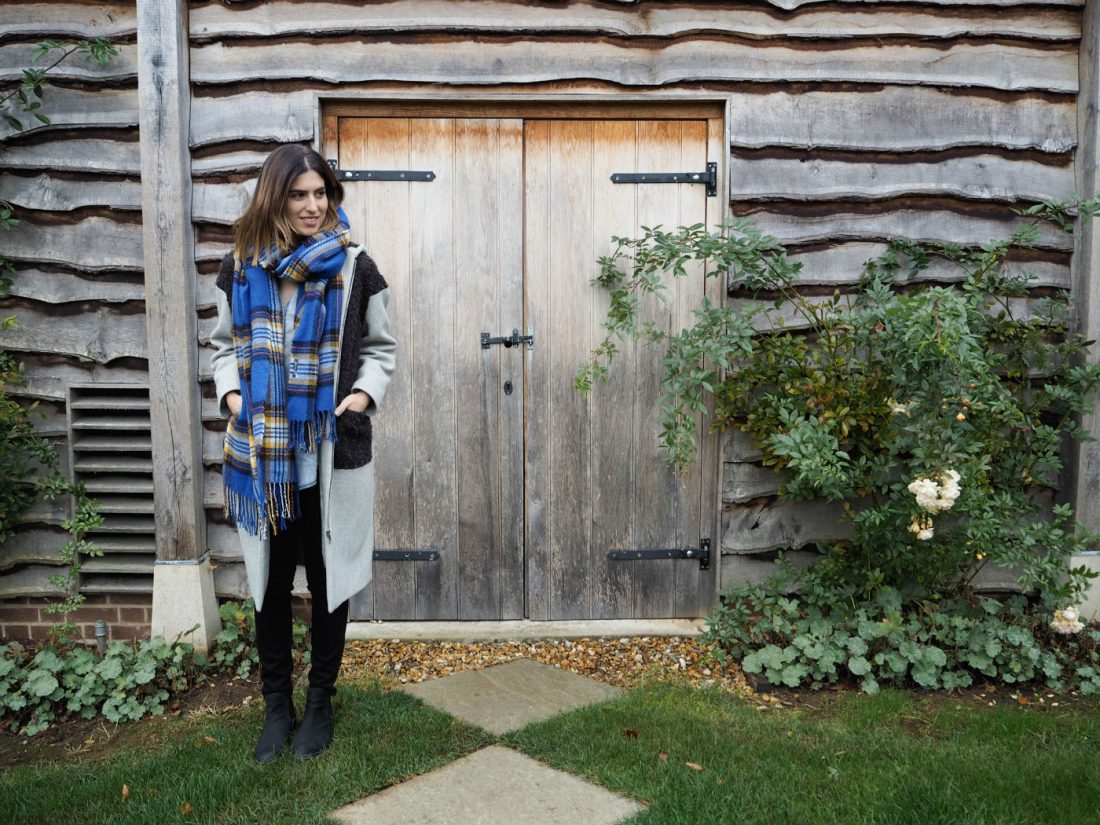 [/column][/row]
[row][column sm="12"]
[/column][/row]
[row][column sm="12"]
 [/column][/row]
[row][column sm="12"]
[/column][/row]
[row][column sm="12"]
 [/column][/row]
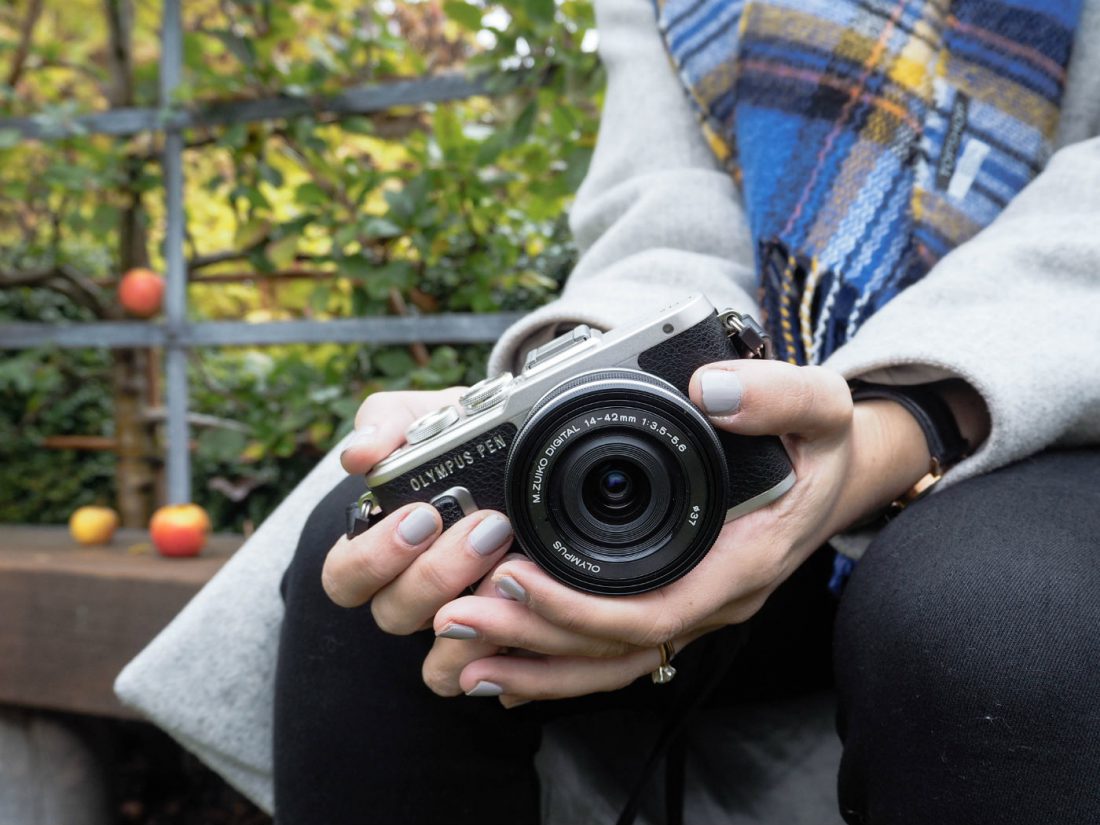
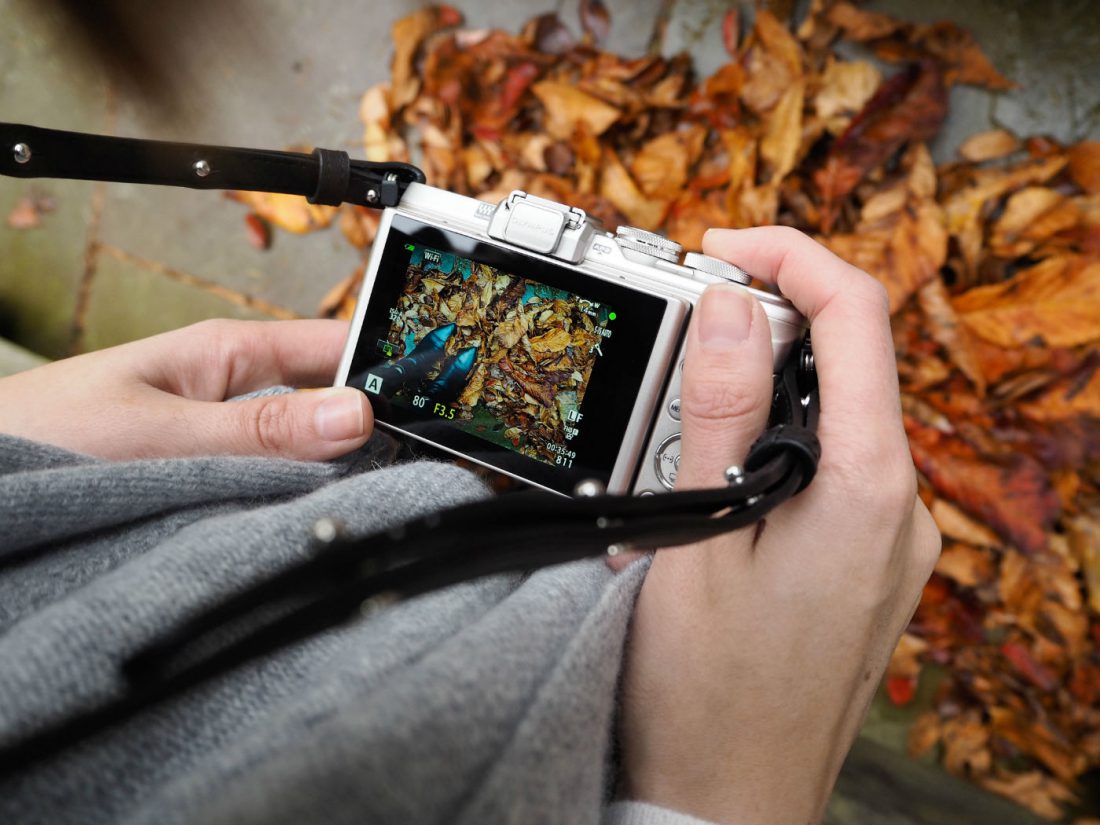
 What I like about the Pen is how light and compact it is, especially if you get the cross body strap. This would encourage me to take it out more and capture images on the go, instead of it being a hassle to carry the camera. The lenses can be changed which makes it far superior to the Canon G7X (although for vlogging I think I'd still use the Canon). Technically the Pen can do what a lot of DSLRs can, you just have to take time to get to know the settings and find the right lens for you.
I really enjoyed spending a couple of days exploring the Thyme surroundings and taking photos , so I hope you like seeing them. It was so nice to spend more time with
What I like about the Pen is how light and compact it is, especially if you get the cross body strap. This would encourage me to take it out more and capture images on the go, instead of it being a hassle to carry the camera. The lenses can be changed which makes it far superior to the Canon G7X (although for vlogging I think I'd still use the Canon). Technically the Pen can do what a lot of DSLRs can, you just have to take time to get to know the settings and find the right lens for you.
I really enjoyed spending a couple of days exploring the Thyme surroundings and taking photos , so I hope you like seeing them. It was so nice to spend more time with 

 [/column][/row]
Thanks to my mum I've been a fan of
[/column][/row]
Thanks to my mum I've been a fan of 

 [/column][/row][row][column sm="12"]
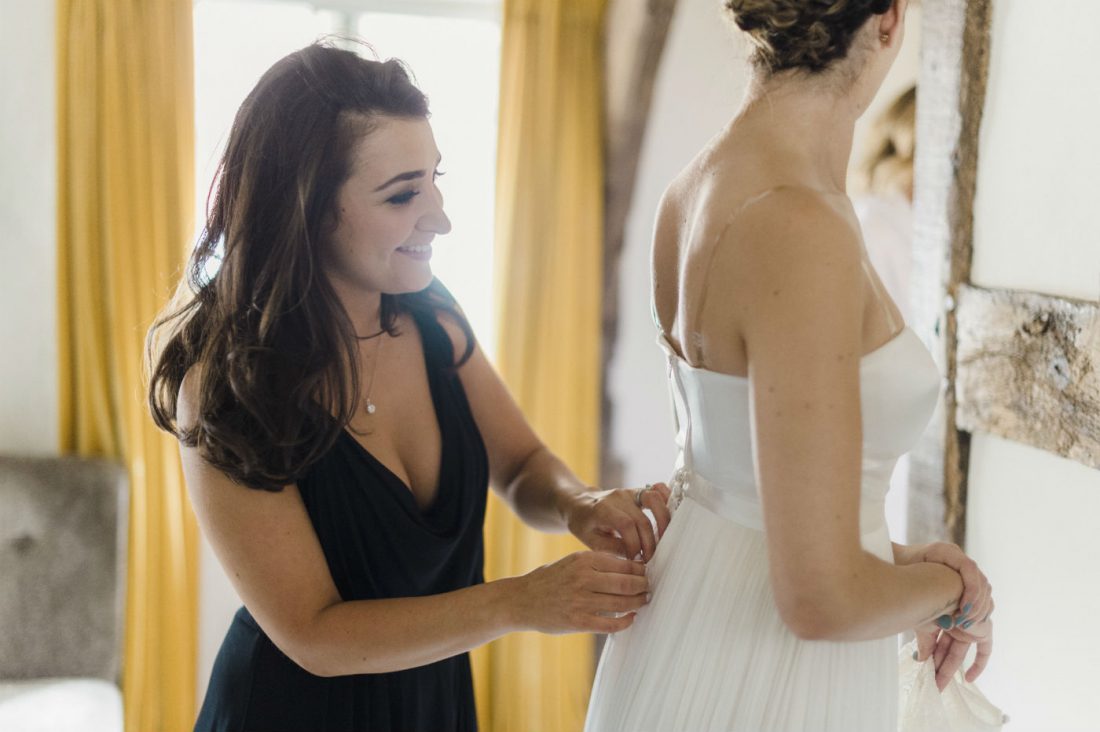 [/column][/row][row][column sm="6"]
 [/column][column sm="6"]
 [/column][/row][row][column sm="12"]
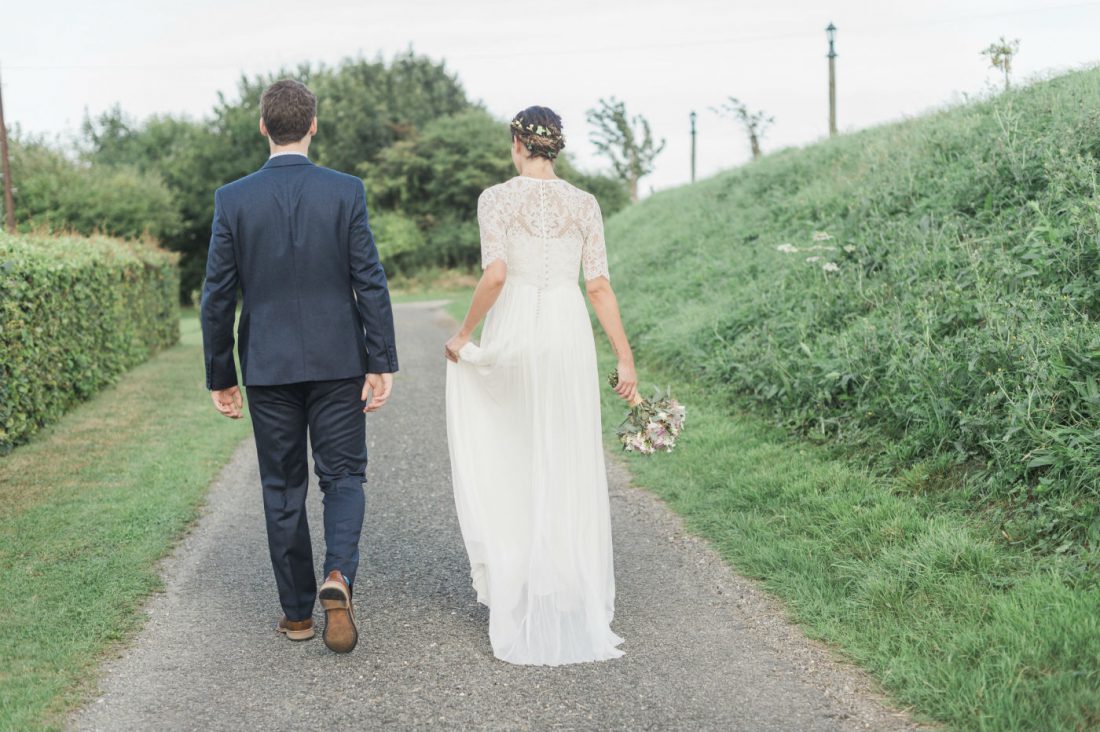 [/column][/row][row][column sm="12"]
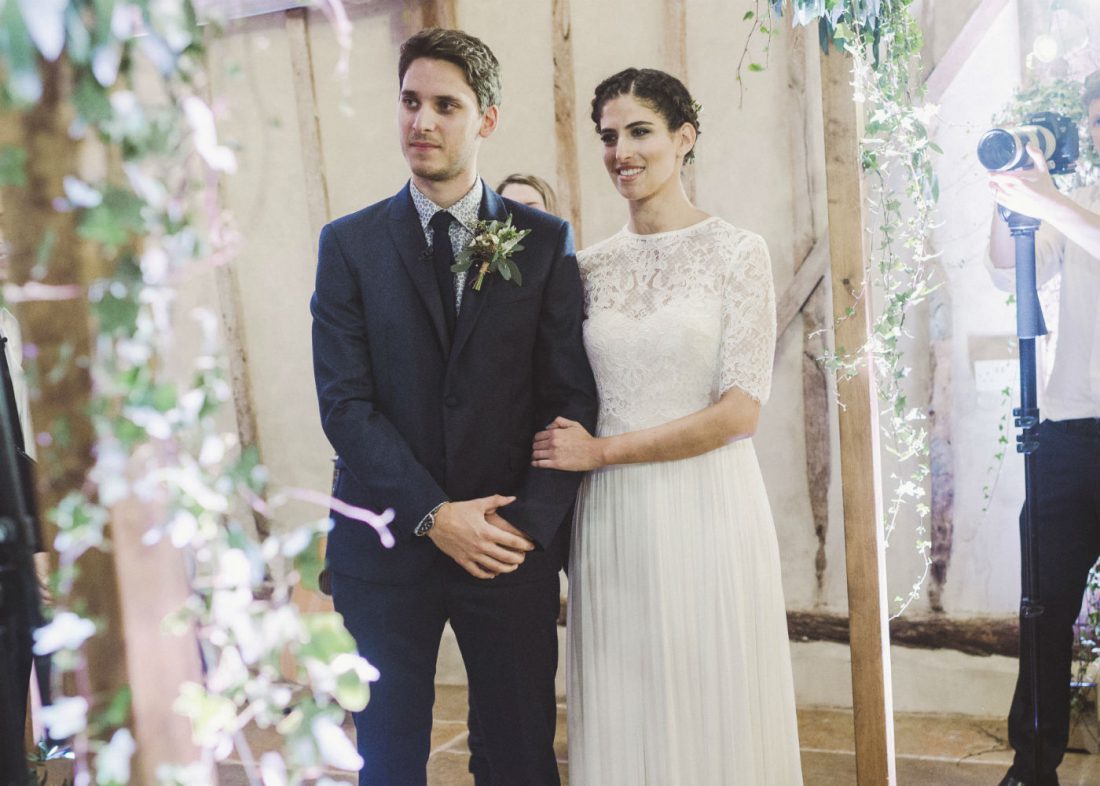 [/column][/row]
[row][column sm="12"]
[/column][/row]
[row][column sm="12"]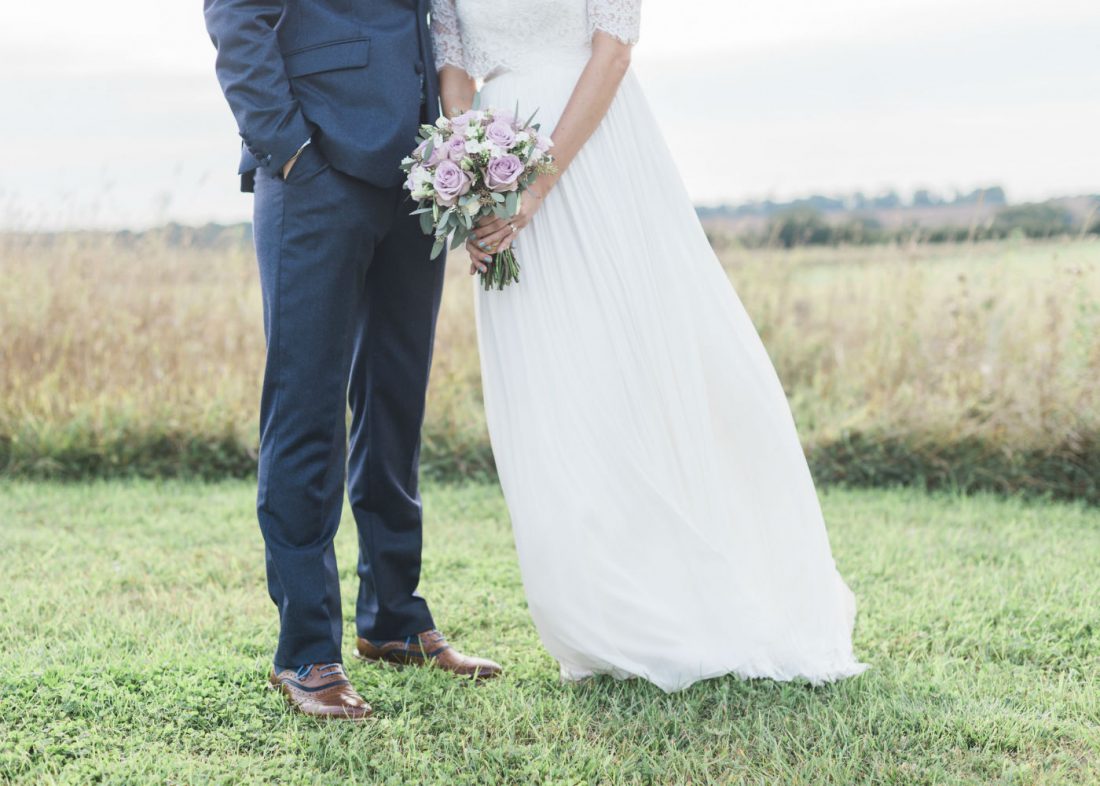 [/column][/row]
I'd never really thought about wedding dresses before I got engaged. In all honesty I had never really seen a bride and thought "ooh I'd love to wear that". I had always been quite confused about the idea of being uncomfortable on your wedding day, not being able to breathe or eat. When I first got engaged I thought maybe I could just go to Selfridges and buy a really nice dress to wear, why did it need to be a wedding dress from a bridal shop? Turns out my laid back approach wasn't as easy to execute as I thought and I struggled to find something that felt right.
The first time I tried on a wedding dress was at a sample sale and we all laughed our heads off as I tried on dresses that made me look like I was playing dress-up. The sample sale process was really intense, I'm not sure I'd recommend that unless you know exactly which dress you want and you know it's going to be there. Honestly I was completely shocked by the price of wedding dresses, I had no idea that people spent that much on their dresses. I think it depends where you prioritise your budget, I personally wanted to invest in the things that would benefit everyone, like food, drink, music and decor. I first went to Mirror Mirror, then to Charlie Brear and then luckily, I struck gold on the third place.
[/column][/row]
I'd never really thought about wedding dresses before I got engaged. In all honesty I had never really seen a bride and thought "ooh I'd love to wear that". I had always been quite confused about the idea of being uncomfortable on your wedding day, not being able to breathe or eat. When I first got engaged I thought maybe I could just go to Selfridges and buy a really nice dress to wear, why did it need to be a wedding dress from a bridal shop? Turns out my laid back approach wasn't as easy to execute as I thought and I struggled to find something that felt right.
The first time I tried on a wedding dress was at a sample sale and we all laughed our heads off as I tried on dresses that made me look like I was playing dress-up. The sample sale process was really intense, I'm not sure I'd recommend that unless you know exactly which dress you want and you know it's going to be there. Honestly I was completely shocked by the price of wedding dresses, I had no idea that people spent that much on their dresses. I think it depends where you prioritise your budget, I personally wanted to invest in the things that would benefit everyone, like food, drink, music and decor. I first went to Mirror Mirror, then to Charlie Brear and then luckily, I struck gold on the third place. 
 [/column][column sm="6"]
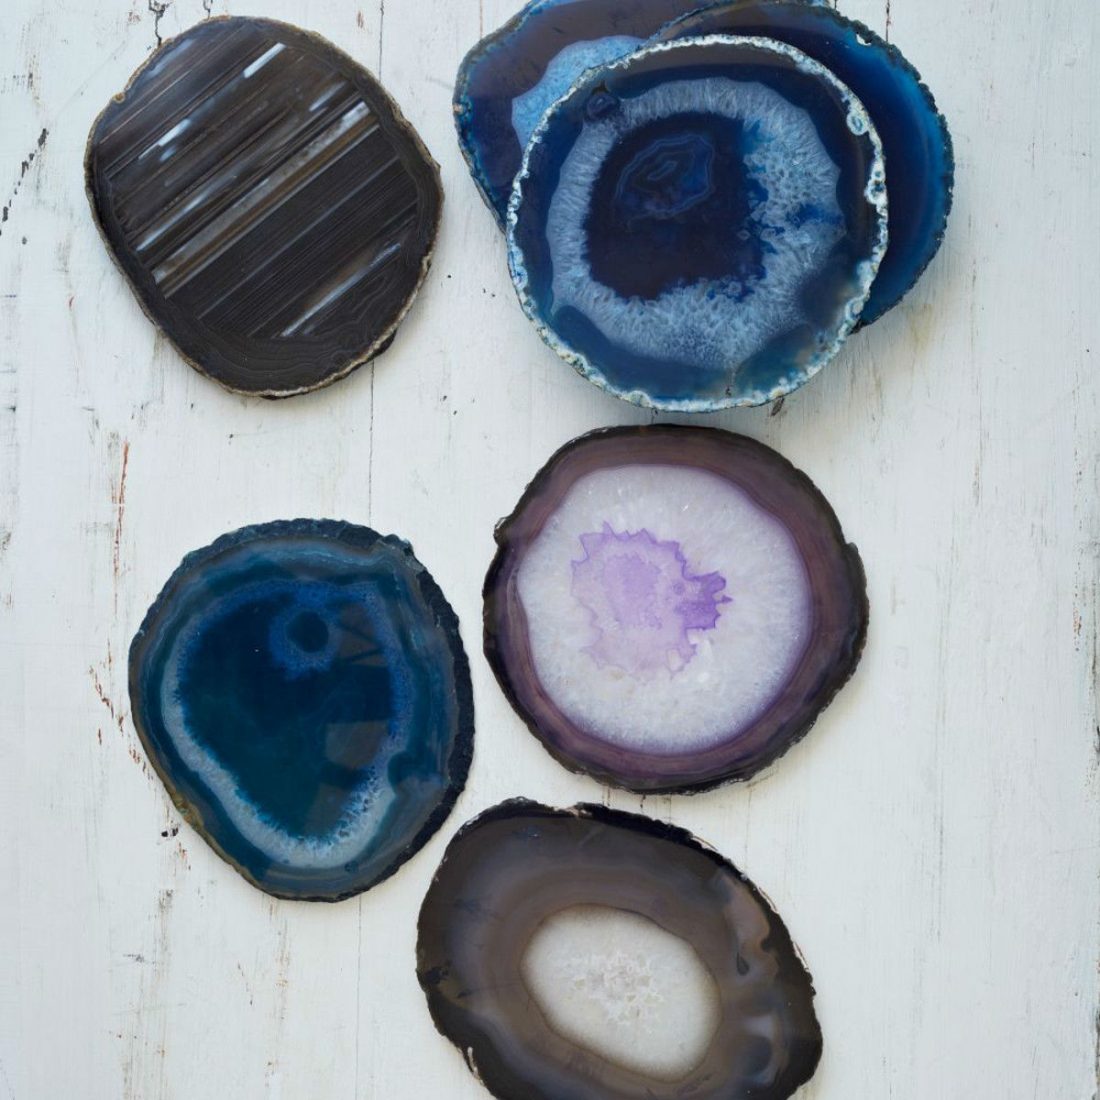 [/column][/row]
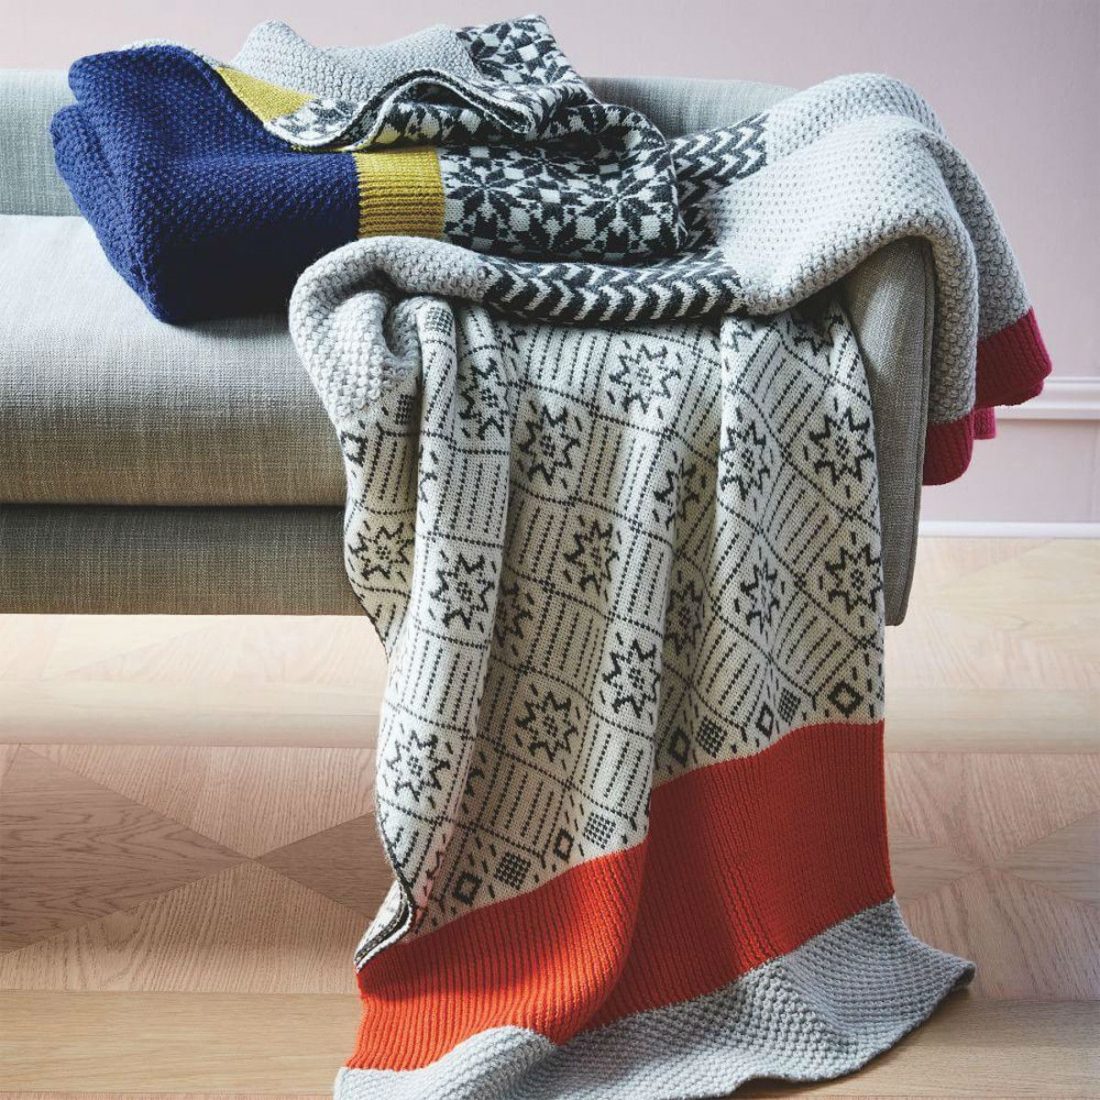
I don't usually do posts like this but I got an email yesterday telling me about the 7 day West Elm discount and I really wanted to share it. I talk about the brand so much but I know it's a little out of some people's budgets!
[/column][/row]
I don't usually do posts like this but I got an email yesterday telling me about the 7 day West Elm discount and I really wanted to share it. I talk about the brand so much but I know it's a little out of some people's budgets!


