Quantcast
Channel: Lily Pebbles
Viewing all 1063 articles
Browse latest View live

NEW REVLON MATTE & LAQUER BALMS

$
0
0


Revlon were the first brand to recreate the famous Clinique Chubby Stick and to be fair, they did it well. Many people actually prefer the Revlon balms and not just because of the lower price point! It was only inevitable that a matte version would soon be launching and it finally has, alongside the new lacquer balms. They're £7.99 each, both wind up from the bottom and have the same peppermint scent, so if you weren't a fan of the original scent like me, be warned! 

So first up are the ColorBurst Matte Balms, 10 shades with a "velvety matte finish and balm-like feel". Take note of the velvety part, as these are not your traditional matte lip products. They're still very much a balm, so although they are not glossy, they are not completely matte and still look like a moisturising lip product. I like the finish though and it makes the product feel more pigmented and easy to use. The softer matte shades work really well in the daytime and the bolder shades are perfect for an evening out. I think the matte finish also makes the brighter shades easier to wear during the day and less likely to migrate. I think the shade selection is nice, with maybe only 3 shades that I wouldn't wear. There are both warmer and cooler shades to suit different skin tones. 

Launching alongside the Matte Balms are the Lacquer Balms, which although I think will be less successful are still really nice. I'm not a very glossy lips kind of person, but if you like a shine these will do just that. There are also 10 shades in this range and the finish is described as "high-shine, shimmering lacquer and balm-like moisture". If you like lip gloss, this is a nice way to wear a glossy finish but get more pigmentation than you would from a gloss. 

It's impossible not to be a fan of such handy, easy to use lip products so I'm excited for so many new products, shades and finishes to be added to the line. The UK release date for these are 22nd January into Boots and 18th February into Superdrug, but often they come into stores earlier so keep an eye out! 

Which balm are you more interested in? 
MUJI Beauty Competition

$
0
0

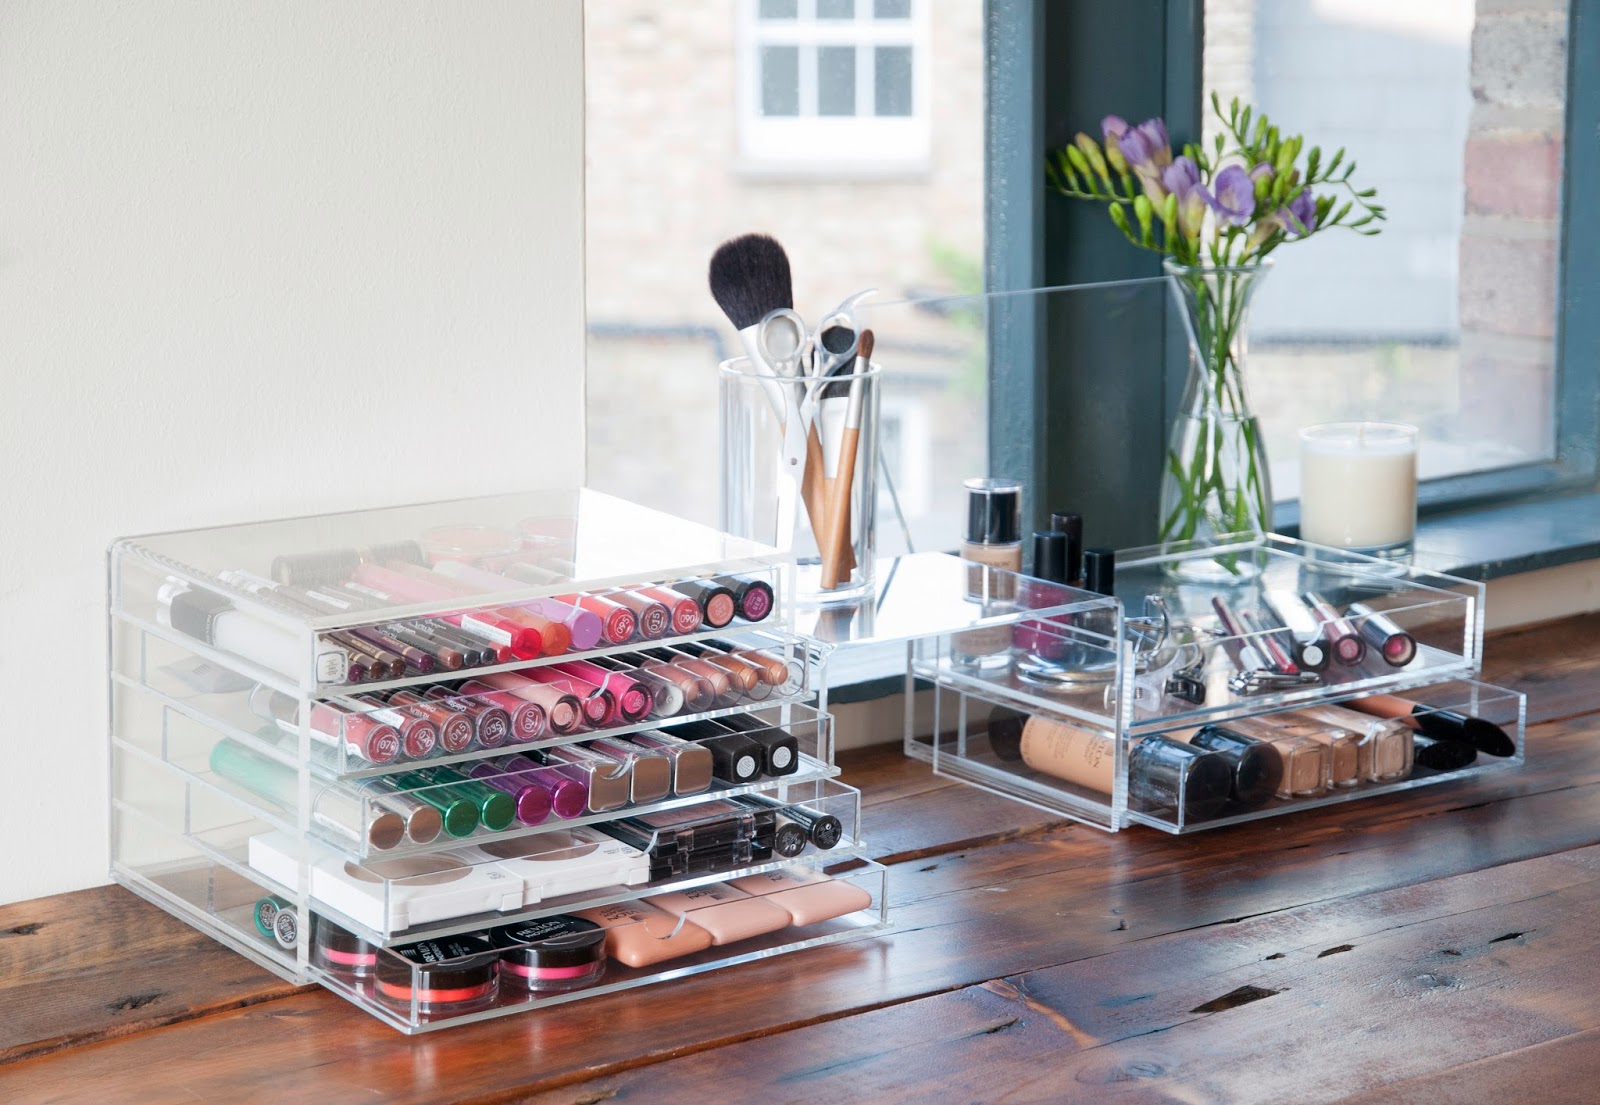
I've been a fan of MUJI since my school days and my obsession with this rubber, but growing up and developing an obsession with beauty made MUJI a whole lot more fun to shop in! If you also love organisation you will understand the enjoyment I get from a fresh set of acrylic drawers filled with makeup. My entire dressing table is covered with MUJI storage where I keep my daily beauty bits, it's a tower that seems to keep growing and growing. 

I've got together with MUJI for this post to tell you about a few very exciting things they have planned for this month. 

- They've given me a 10% discount code for you to use until 13th February. You can either use it online using code MUJIBEAUTY or in store by clicking here and downloading this voucher

- They're also holding a huge event in their Oxford Street store on February 13th where you can get 20% off everything on the night and there will also be some fun activities happening in store. 

- Finally, I am joining with MUJI to hold a competition where one of you can win a £200 voucher to spend at the event on 13th February. I'll be there and I'd love to do some shopping with the winner and hopefully put together a dream makeup storage set. The winner will also get a free Shu Uemura eye makeover in store on the night. 

Click here to enter the competition on the MUJI Facebook page and see below for details of the competition. 

I'm really excited for the event and hope to see some of you there enjoying the discount! 


Details of the competition: Details of the competition: Enter for the chance to win £200 to spend in-store, shop with me and enjoy a Shu Uemura eye makeover at MUJI's exciting beauty themed evening this February on the eve of Valentine's Day. To enter, you must be able to attend the MUJI Beauty Event on Thursday February 13th, from 6-9pm, and make your own travel arrangements to and from the event.


*This is a sponsored post 

EXTRA BLOGGING & ORGANISATIONAL TIPS

$
0
0

So here is the final instalment from our #guidetoblogging series on YouTube. In today's videos we'll be discussing extra blogging & organisational tips on my channel and extra vlogging tips on Anna's channel. 

If you have missed the past 4 videos from this series, check out this playlist where they are all linked! We have discussed starting a beauty blog, starting a YouTube channel, our blogging equipment and our filming setups

Thanks for all your feedback so far! Feel free to tweet us @lilypebbles and @viviannamakeup with your feedback and questions using the hashtag #guidetoblogging

We'd also love to see your blogs and YouTube channels so send us some links! 

Thanks for watching the series, we had so much fun planning and filming it so we hope you enjoyed watching it! 

DIY FACE & HAIR MASK

$
0
0

I've seen DIY face and hair masks circulate the internet for years, but I've never felt the need to join in as I have my three favourite face masks on hand for exactly what I need. No Money Month gave me the push I needed to give a DIY face and hair mask a go and I am so happy I did because it was an amazing experience. I'm not an all natural kind of person, for me it's all about the results but I was seriously impressed after making and using my own masks that I would 100% do it again. Both these masks are really basic and easy to make you probably won't even need to buy anything! 

So here's how it went. Me, my mum, two bowls, half an avocado, a squeeze of honey, a splurge of olive oil and a scoop of coconut oil. 

Let's start with the hair mask. We always have coconut oil around the house, if you don't you should! It can be used for so many things including cooking, we made a delicious curry using it last week. I took a small scoop of coconut oil and mixed it with around 2 tablespoons of olive oil. Rubbing them together in my hands I then worked it into my hair from root to tip. I wouldn't recommend doing this unless you have really dry hair as it takes quite a lot of shampoo to remove, so just apply it to the ends of your hair. I left the hair mask on for 20 minutes before washing it out with shampoo and following with my usual conditioner. I could instantly feel the results, my hair felt incredibly soft and was much easier to straighten. Compared to most masks where the softness only lasts one night, I woke up the next day and my hair still felt incredible! It's definitely an intense mask and I needed to use a bit of clarifying shampoo to completely remove it, but if you have dry and damaged hair like me it's amazing! 

Onto the face mask... I look great, right? To make it I simply mixed up half a ripe avocado (using the back of a fork) with a big squeeze of honey. The avocado will soften the skin and improve skin tone whilst the honey is anti-bacterial, includes loads of antioxidants, is moisturising, soothing and clarifying for the skin. Having my mum do this with me was the real test... let's just say she's somewhat picky when it comes to skincare. We pressed the mask onto and around the skin using our hands and left it on for 10 minutes before washing it off with water and a muslin cloth. I washed mine off first and my mum's reaction was "wow your skin literally looks glowing!". She was right, it looked fresh, healthy, glowing and it felt amazing too. The effects weren't short-term either, we both had compliments on our skin the next day and the texture of the skin felt really great. 

I had a really positive experience making my own masks and I'd definitely do it again, especially the face mask! Have you ever tried a DIY face or hair mask?

UTILISE YOUR BEAUTY STASH

$
0
0

It seems that these days a lot of us (and not just the ones who work in the industry) are guilty of having an overgrown beauty stash. There are so many launches throughout the year that it's easy to just keep buying and buying without using up what you've already got. 

Here are some of my tips and tricks for utilising your beauty stash... although I'm not going to preach because really I should be taking my own advice! 

USE IT UP //
It's so easy to move on from a loved product to something new and shiny but I'm personally going to try and use up more of my products this year. The first tool that will be helping me with this is this tube squeezer I ordered from Amazon. It looks bizarre, but it helps squeeze out every last drop from a tube and works especially well with metal tubes! It was really affordable and I think the idea of being able to squeeze a tube with it will encourage me to use more of the product. You can also just grab some scissors and cut things open, especially shampoo and conditioner... there is always more in there than you think! 

FIND ANOTHER USE // 
If you're feeling a bit 'meh' about a product and it's not really working out for you, try and find another use for it! A body moisturiser can be used as a foot cream and a body exfoliator can be used as a foot scrub. If you have a pink lipstick that's not quite working for you, see if it works as a cream blush! A powder or cream highlight could also work well as an eyeshadow and if you have any bright eyeshadow pigments they can be mixed with a clear topcoat to create a nail polish. Something I always seem to accumulate is hairspray, so I often use it as an eyebrow set by spraying it onto a spoolie before combing through the brows! 

GIVE IT AWAY //
If you really have no use for a product then get rid of it, there is no point in keeping it. I have a stash of products I may need for the blog but anything that really has no use either gets given to friends or charity. Give & Makeup is a great charity that you can find more about here and donate your unused products to. 

START A ROTATION //
This is for the products you love but neglect because you have more than one on the go. Start a weekly rotation where  at the end of the week you swap your products for different ones. This will also help you decide if any products need to be put to another use or donated. 

So here are just a few ways to utilise your beauty stash, but I hope it's inspired you to use up some old favourites and dig out the unused and work them into your weekly rotation! 

DRUGSTORE BEAUTY HAUL & REVIEW

$
0
0


Although I've been encouraging #nomoneymonth, behind the scenes I've been hauling to make sure I have enough products to talk about all month! So although I've been trying to save you guys some money, it's not quite been the same story for me. I love a good drugstore haul though, so here's a video on my latest purchases. Enjoy! 


THE DRUGSTORE DOLCE VITA

$
0
0

The problem with filming Dailymix videos with Anna is that I usually end the day with a list of things I need to buy and this time it was the Rimmel Glam Eyes HD eyeshadow palette in Brixton Brown (worn above). Not only is a great eyeshadow palette but it's very similar to the Charlotte Tilbury Dolce Vita quad, which has been a stand out product from her new high-end makeup range. Both palettes have a red-brown undertone that is incredibly flattering when worn well. 

They're very comparable, maybe not on packaging but on shadow quality. The Rimmel shadows are also incredibly buttery and easy to blend. In the Charlotte Tilbury palette there are two very wearable shades and two slightly harder to wear shades, a copper glitter and a cranberry brown. In the Rimmel palette there are four easy to wear neutrals and one harder to wear red brown. I think the Rimmel palette caters to a wider audience and would get more use in my makeup collection. The obvious difference is the price, £38 and £6.99. I think the Dolce Vita palette is gorgeous, but if it's out of your budget this Rimmel palette is a great alternative! 

Have you tried the Brixton Brown palette? 


WEAR LIFE EATS

$
0
0

WEAR //
This week I've been testing out the Rimmel Match Perfection foundation. I had such a nightmare picking a shade because Ivory, True Ivory and Classic Ivory all look very similar. After assuming that the difference must be pink and yellow undertones, I asked two sales assistants in Boots and one in Superdrug but only one of the girls even knew what that meant, but still didn't know the answer. I tried swatching them on my chin and in the end I ended up with two shades. On my first visit only Ivory was in stock, but after trying it at home I realised it was too light so went for True Ivory which seemed like the less pink out of the two others. Can you tell I'm stressed by this?! 
It's a nice foundation though, not too heavy, not too light but it is quite wet so needs to be set before applying any makeup on top. 

LIFE //
My older sister and I randomly decided to sign up for a six week ice skating course and we had our second lesson this week. We both know how to skate, so thankfully weren't put it the beginners group, but we wanted to do something a bit fitness related that would also be quite fun. I'm loving it so far and I can't wait to be able to skate with complete ease!

EATS //
During a day out in Covent Garden, Rich and I went to try out Homeslice which has recently opened in Neal's Yard. It's a small restaurant with a basic concept where you can either order a 22" pizza with half and half toppings to share or you can order by the slice. Be warned the pizzas and the slices are huge! We got a 22" with half salami and rocket, half mushroom, ricotta and truffle oil. We left about a quarter but of course took it home with us! It was delicious and the place had a great atmosphere so I'd recommend popping in for lunch or getting a takeaway slice! Did I mention that the toppings were insane?! Lamb, butternut squash, think of the most bizarre but delicious topping ever and they've got it! 

Have a great weekend and don't forget to follow me on Instagram @lilypebbles for daily photos! 

A GUIDE TO BLOGGING & VLOGGING

$
0
0

If you follow me and Anna it's unlikely you would have missed our #guidetoblogging series, but I wanted to summarise all six videos in one post so you can refer back to it whenever you might need to! If you already have a blog or YouTube channel or are thinking of starting one, the videos below might help you on your way. Thanks for watching! 


DRUGSTORE NAIL POLISH HALL OF FAME

$
0
0

When it comes to nail polish the drugstore brands get it spot on! For this week's nail post I'm showing my hall of fame, the best of the best of affordable nail polish. 

When it comes to formula, the Rimmel Salon Pro with Lycra and the Barry M Gelly polishes are great. They both have a slightly thicker, gel effect that looks amazing on the nails and lasts really well. 

For shade range I really like the Topshop and the Kiko polishes. They both offer a huge selection of shades and the polish is of course great too. I know Topshop isn't available in the drugstore but they retail for only £5 in Topshop, Selfridges and John Lewis.

The Revlon nail polishes are classics in my opinion and they have genuinely been around for ever. The shade range is chic and sophisticated and I actually really like the long thing brush, it reminds me of salon polishes. In contrast the Bourjois One Second polish has a short, slanted, wide brush that makes application really easy. The formula is really long lasting and they often bring out new ranges of shades that are always really on trend. 

I'd highly recommend all of these and I'd love to hear what your favourite drugstore nail polishes are? 

WHAT'S ON MY FACE #41

$
0
0

I'm welcoming my WOMF posts back into 2014 with a rather neutral, everyday look that is suitable for #nomoneymonth. I'm still very much enjoying the Rimmel Match Perfection foundation and it works really well with the new Rimmel Stay Matte primer. To conceal I used a mix of Maybelline's The Eraser Eye layered under my eyes and Bourjois Happy Light for around my nose and chin. I found the Bourjois concealer really easy to blend with my fingers and it worked really well to conceal any blemishes. For my eyes I chose to use the Kiko Long lasting Stick Eyeshadow in 06 because it is so easy to apply, requires minimal blending and lasts all day without creasing. My lips had to stay bare though as I'm currently  suffering from really chapped lips, so I'm on a bit of a lipstick ban... although I'm sure it won't last long! 

BASE:

COLOUR:

EYES:
Kiko Long lasting Stick Eyeshadow '06' // Maybelline Falsies Big Eyes Mascara

LIPS: -----


GIVEAWAY: THE WET BRUSH

$
0
0

I got my hands on a Wet Brush towards the end of 2013 and although I'd only been using it for a few weeks it made it into my 2013 favourites video and I didn't even think twice about including it. I've tried the Tangle Teaser, I've tried the Michel Mercier brush (liked it but it broke after a few uses) but neither compared to this miracle worker. 

In the past it's only been available in America but since September it's been sold in Sally's in the UK. It's only £6.95 and it comes in loads of different colours and prints. 

You've probably heard professionals say that you shouldn't brush your hair when it's wet and that's because wet hair is more prone to tangling, stretching and snapping but if you have hair like mine, brushing it wet is my only option. The Wet Brush has been specifically designed for this, using a unique technology that makes the bristles on the brush bounce back and be flexible when used through the hair. 

It feels incredibly gentle yet it gets through every single knot and tangle quickly. I also love that it just feels like a normal brush and is easy to hold with the comfortable handle. I know this is just a brush, but I can't tell you how much I love it and how it's made hair washing nights so much easier. 

So here's the exciting part, I've got 10 brushes to giveaway! I'm genuinely excited about this giveaway as I love seeing people's reactions when trying products I love. To enter the giveaway just use the form below! The winners will be announced and updated on this post on Friday 24th January and will be emailed soon after. 

Good luck! 


a Rafflecopter giveaway

RANDOM OUT & ABOUT VLOG

MAXFACTOR COLOUR PRECISION EYESHADOW COMPARED

$
0
0


I've raved about the Rimmel Scandal Eyes Shadow Paint far too much, but it really is one of the best eye products I discovered in 2013. It's a liquid eyeshadow that works really well as either a base under shadow or on it's own and it lasts longer than any other shadow I've tried. So when I came across the Maxfactor equivalent in Superdrug I wanted to put it to the test and see how Coffee compares to Rimmel Rich Russet. 

First of all let's compare shades, whilst Rich Russet is a very metallic and reflective bronze, Coffee is a more of a muted down, grey toned brown. Because of less metallic finish, the shade naturally looks darker on the lid and quite heavy compared to Rich Russet. 

Both products have very similar doe-foot applicators and apply smoothly, with maybe a bit more product coming out of the Maxfactor version when applying it. The only real difference is the price, the Rimmel is £4.99 and the Maxfactor one is £6.99. 

I really thought that this would be an easy comparison but actually they are both so similar it's hard to compare. The Rimmel one still wins for me, especially as the price is lower but if you find it a bit too metallic, the Maxfactor version will work just as well, won't crease and will create an even smokier eye look. 

Which one is your favourite? 

MAXFACTOR: THE GOOD & THE BAD

$
0
0

Keeping with the Maxfactor theme today, I thought I'd show a product that has wowed me and a product that has sadly left me rather disappointed. 

The Max Effect Mono Eye Shadow in Golden Bronze is the most beautiful, easy to use shade that's great for days when you're in a rush. It's very similar to MAC Soba which is a slightly yellow gold. I find this shade looks really pretty when taken quite far under the eye, but I also find I need to use a brown liner to deepen it up a bit! The pigmentation is great and I love the small packaging. 

I was really excited to try the Maxfactor Smoky Eye Effect eyeshadow as a possible dupe for the Clinique Chubby for Eyes. When first applied I was really impressed, it applied easily and the two shades work really well together. The lighter shade is nice all over the lid and then the darker brown works nicely in the crease, I also found I could blend them easily with my finger. Maybe twenty minutes later I looked in the mirror to find all the product had bunched up and left the most obvious brown line along the crease of my eye. I tried it again with primer and the same thing happened. This is a huge no for me when it comes to cream eyeshadows, so I won't be using it again and wouldn't recommend it. 

So there's the good and the bad. Are there any other Maxfactor products I should try? 


L'OREAL PARIS COLLECTION PRIVÉE

$
0
0

I stumbled upon the L'Oreal Paris Collection Privée lipstick range last weekend in Superdrug and I don't know where I've been, but this is the first I've heard of it. There are so many new launches and sometimes they can whizz by without me noticing, this was one of those. It grabbed my attention in store though, so I picked up two to try out. 

There are definitely pros and cons with this range, but a huge pro is the idea itself. I find nude lipsticks quite hard to shop for in the drugstore as a collection usually offers multiple pinks and reds but only one nude shade to suit all. The idea of this collection is to offer a nude lipstick to suit every woman. Depending on your skin tone, hair colour and other factors, everyone will suit a different nude and L'Oreal have used iconic famous women to represent the nude shades. I think it's a great idea and makes shopping for a nude lip so much easier. I picked up Cheryl and Julianne's nude, although clearly I'm not Julianne's colouring I just like pink nudes sometimes. 

The formula is quite sheer, which I don't actually mind because it means you don't need a mirror to apply them and they work more like a moisturising nude balm. I think for their price (£8.19) they could have been more pigmented but as I said, the sheerness doesn't really bother me as I'm happy to reapply and nudes that are too pigmented can look a bit strange on me. Something I really disliked about these lipsticks is the scent of the product and I was heavily warned about this on Twitter. They smell like proper old school, grandma lipsticks and it's such a strong scent that when I have it on I can't really talk or breathe without feeling like I'm inhaling the plastic scent. At first I thought it wasn't that bad and that I could overlook it, but after a few attempts I find it so bad I'm not even sure I can wear them.... It's a massive shame. 

I love the two shades I picked. Cheryl's nude is the perfect brunette nude and Julianne's is a pretty pink toned nude which works well as an everyday lipstick. I'm truly gutted about the awful scent as I would have loved wearing these nudes, but I think if you're not as sensitive to smells as I am, you'll love these! 

Who's nude suited you from this range? Did you mind the scent? 

TEXTURED LAYERS

$
0
0

The Oribe Dry Texturising Spray and the Bumble & Bumble Thickening Dry Spun Finishing Spray have been heavily featured on most beauty blogs in the past and it's for good reason too. They help create textured layers throughout the hair as well as volume and lift in the roots. The hunt for a drugstore alternative was tough, but I've finally found a product that fits the bill. 

The TRESemme Devine Definition Spray from their Texture range is really comparable but at only £5.50 compared to Oribe's £38 and Bumble & Bumble's £21.50. I like to spray it into the roots for a lift that lasts and throughout the mid-lengths of my hair as well. Spraying it into the mid-lengths separates the hair, gripping onto the layers giving that kind of Alexa Chung style. 

It's not quite as amazing as the Oribe and Bumble & Bumble, but for £5.50 it's an amazing alternative! Have you tried this or do you have any other affordable texture sprays you like? 

DRUGSTORE MAKEUP TUTORIAL

$
0
0


Carrying on with #nomoneymonth on my YouTube channel, this week I have a drugstore makeup tutorial. I've used a minimal amount of products to create quite a natural daytime look, so I hope you enjoy watching it and don't forget to subscribe! 


BIODERMA VS L'OREAL SKIN PERFECTION

$
0
0

Bioderma has always been famous within the beauty industry and used by makeup artists all over the world but over the past few years Bioderma Crealine H2O has crept it's way into the press, into the blogging community and therefore into the hands of consumers. Everyone wanted to try the cult French cleansing water, I for one spent years stocking up every time I visited France. It used to be impossible to get hold of, then eBay started selling it and now, finally it is available online in the UK as well as in so many stores around London. It's a staple in my skincare routine, usually just for my eyes but sometimes also as a pre-cleanse if I'm wearing a lot of makeup. Although it's not expensive, I wanted to try out a drugstore alternative that is easier to get hold of and even more affordable. 

A micellar water I hear a lot about is the L'Oreal Paris Skin Perfection, so I picked one up and took it for a spin. I'm disappointed to say this, but here are my two main reasons why the L'Oreal Skin Perfection isn't as great as the Bioderma Crealine H2O.

THE PACKAGING //
You see this photo? At this point I'd only used it twice and look how much product has gone. Unlike the Bioderma that you have to squeeze the water out, this one falls out onto the cotton pad creating a lot of waste and too much product for my liking when using it on my eyes. 

NOT QUITE WATER // 
Unlike Bioderma which literally feels like water, the Skin Perfection feels more oily and leaves a slight residue on the skin. When using it on my eyes I did feel a slight stinging sensation and wasn't happy with the oil left around my eyes. 

I would have said it was an ok alternative when Bioderma was harder to get hold of, but now it's available on Escentual and in so many pharmacies, I'd 100% recommend sticking with Bioderma Crealine H2O. Have you tried the L'Oreal alternative? What did you think?

WEAR LIFE EATS

$
0
0

WEAR // 
This week I picked up the faux leather fronted leigh jeans from Topshop. I've wanted some leather trousers for ages, but I find them quite stressful to wear as they never fit properly, they're a bit uncomfortable and well, let's be honest I'm always fearful of a Ross Geller moment. These are the perfect compromise as they feel exactly like the normal leigh jeans, from the back the look just like black skinnies but from the front they look like tight leather trousers. These couldn't be more up my street! 

LIFE //
This week Estée and Sammi uploaded their collaborations videos and oh man, two of my favourites in the same video! I really enjoyed watching both videos, they're both just so natural, relaxing and fun to watch. I'd definitely recommend watching them if you haven't already, I've added them both to a playlist here

EATS //
I was taken to a small, authentic Ramen restaurant called Shoryu in Piccadilly Circus by my friend and it was so good! If you're a fan of huge bowls of ramen you need to check this place out. We went for dinner but I can imagine it being great for a quick lunch! I don't really know what else to say apart from, it was so yummy!


Don't forget to follow me on Instagram @lilypebbles for daily photos!
Viewing all 1063 articles
Browse latest View live


Latest Images